Stiching Photo Mosaics
Matthew Hallac
Part A: Image Warping and Mosaicing
For this project, I have fun with homographies to warp images and create mosaics, building panoramas from muliple images.
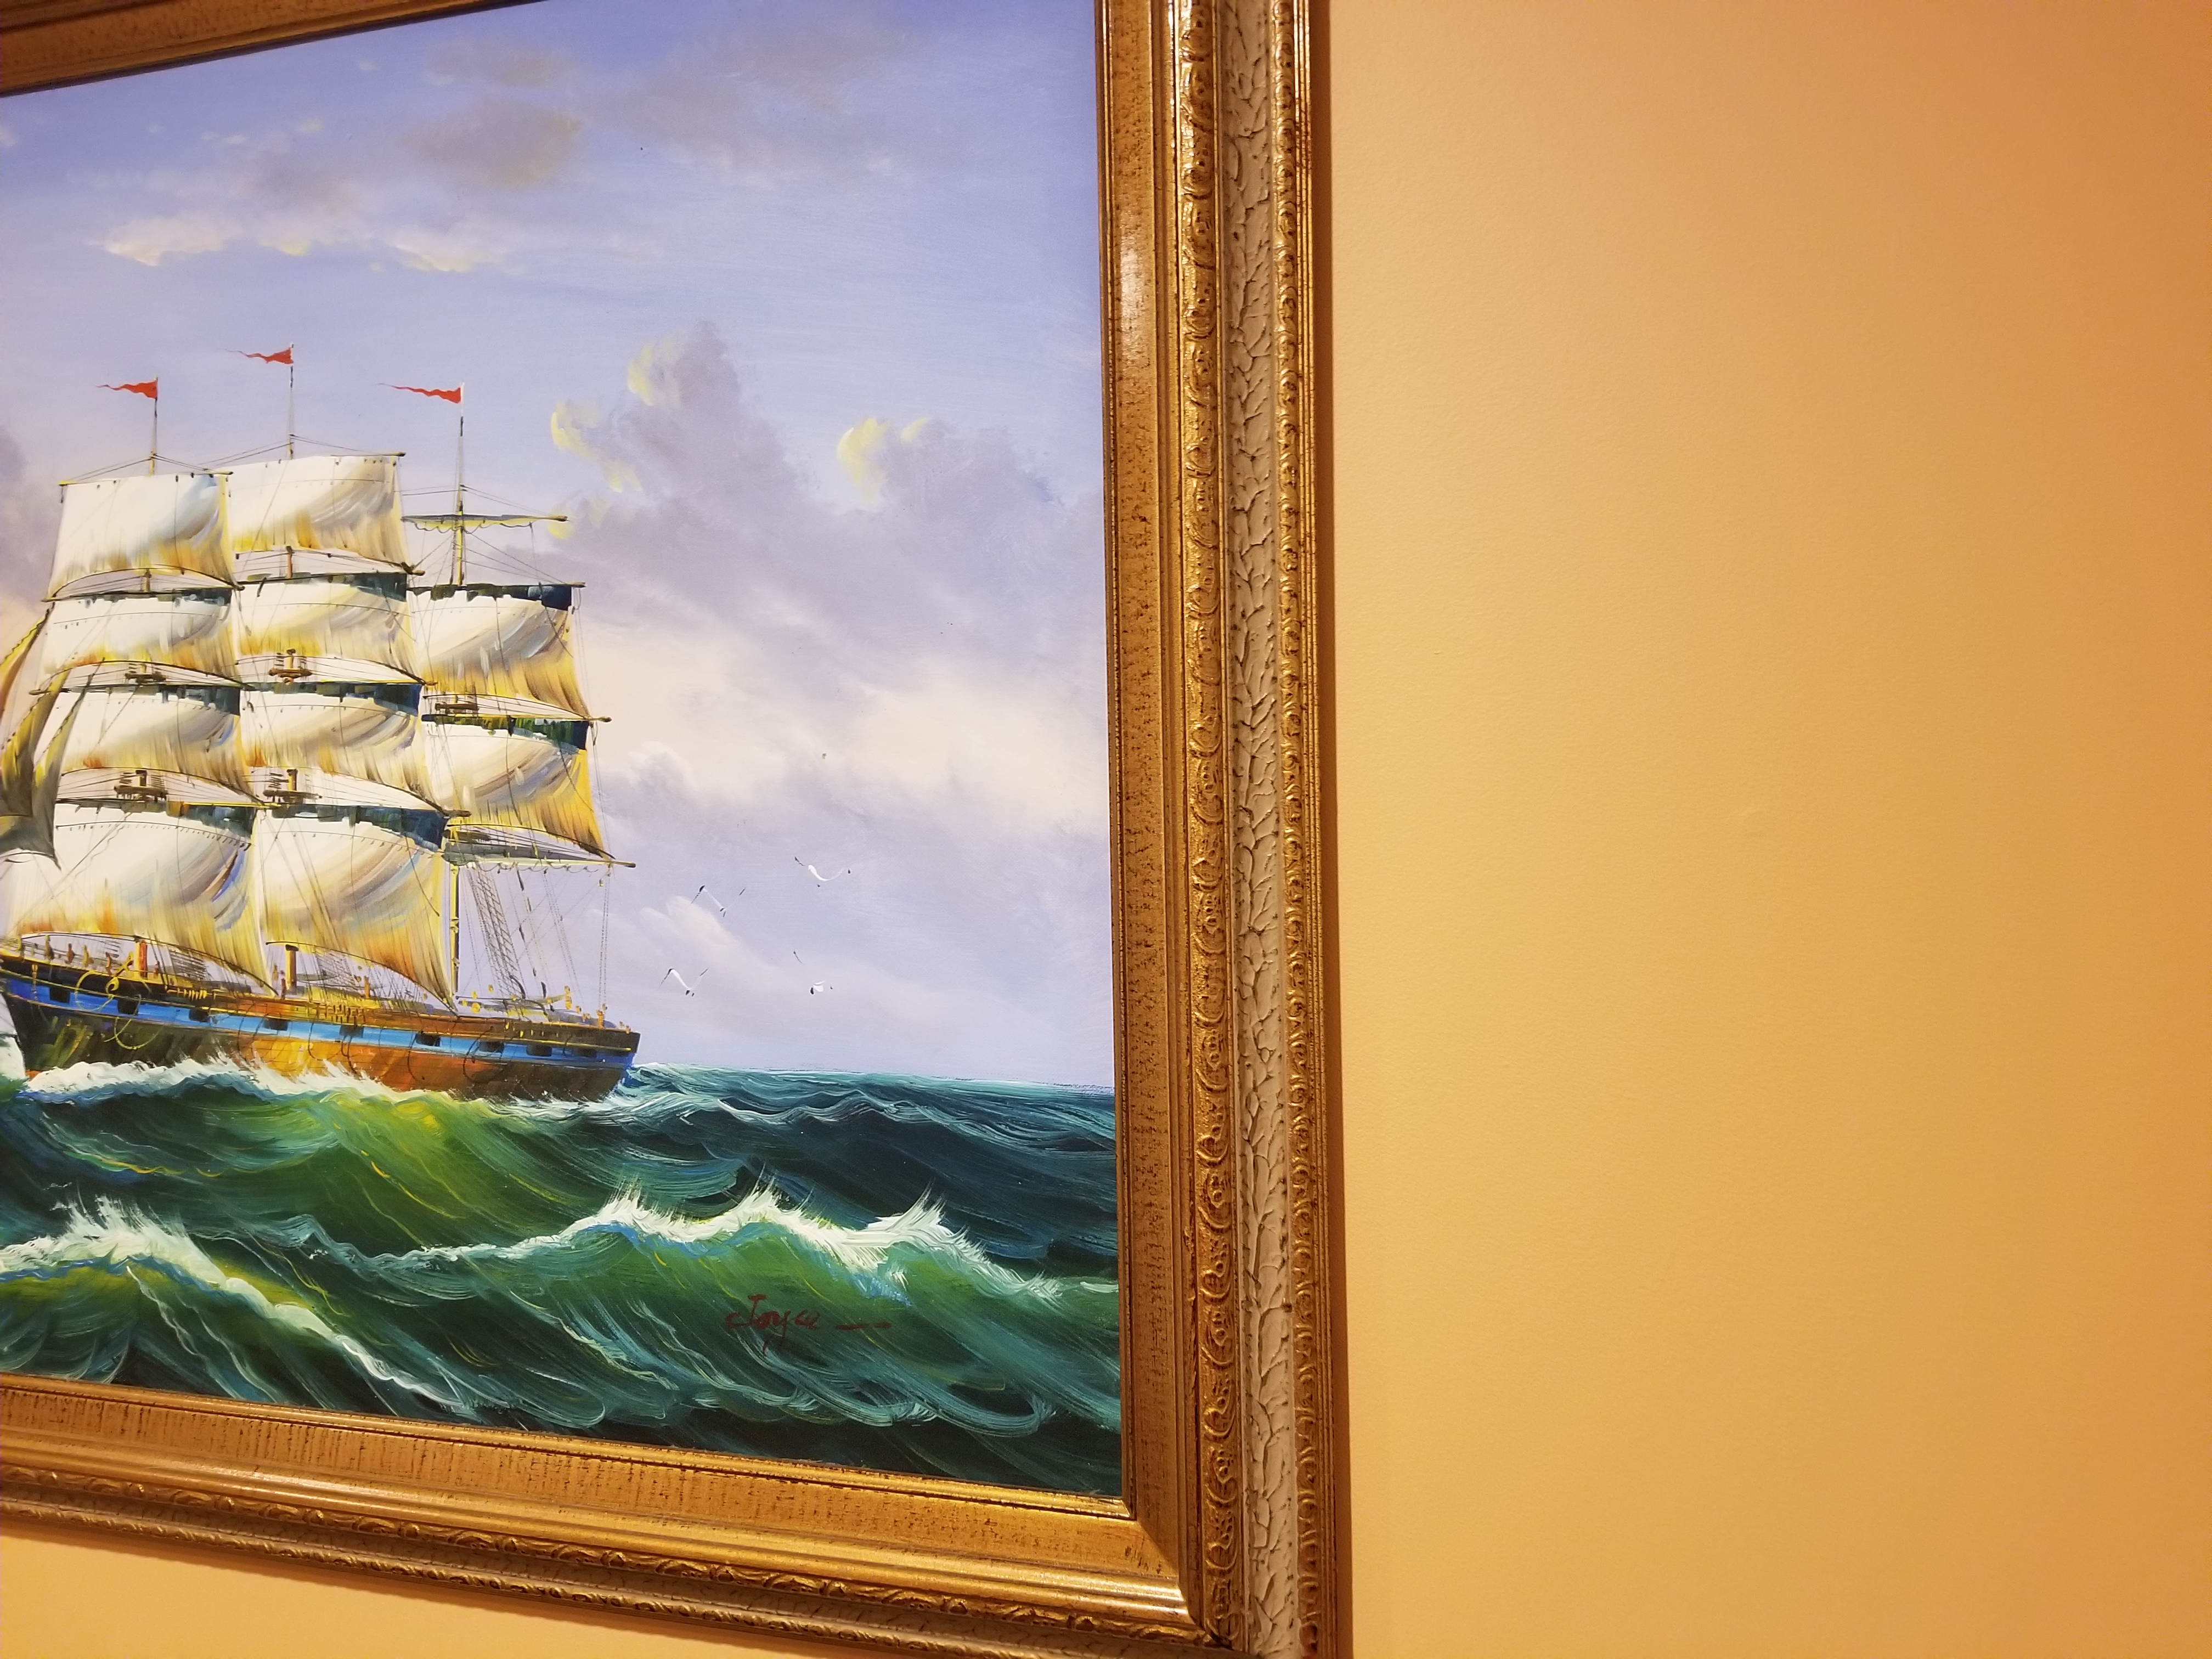
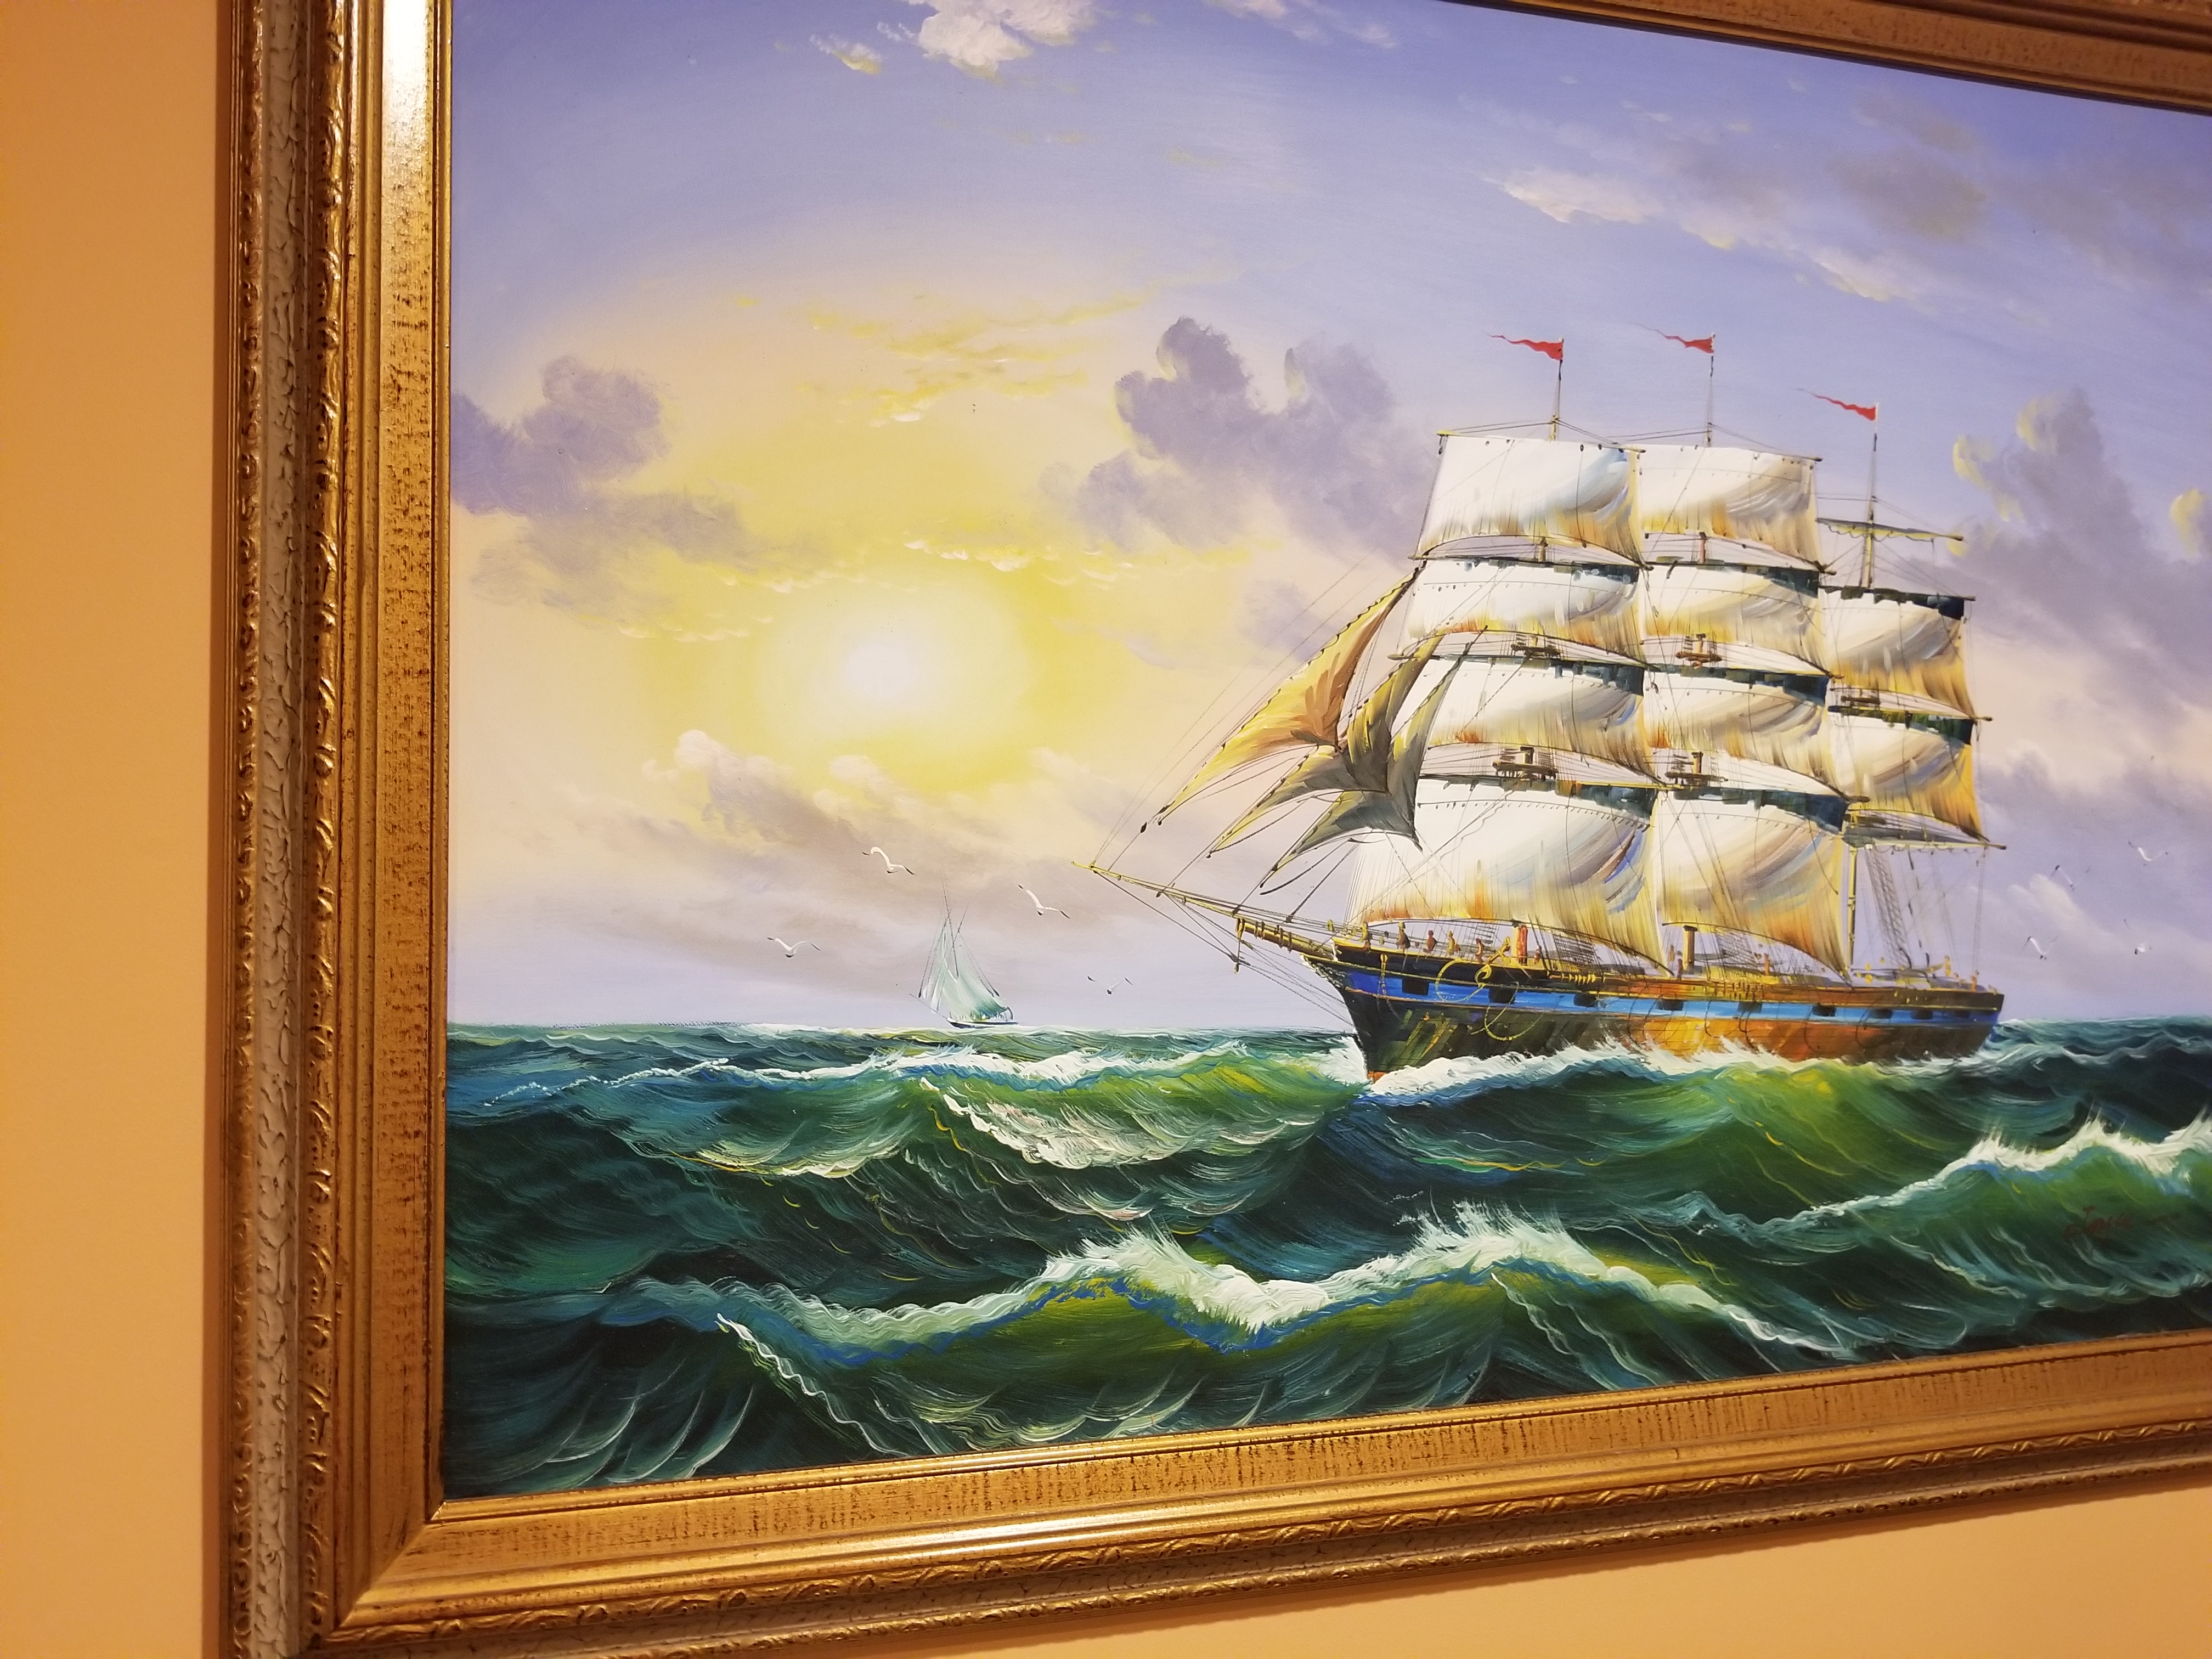
The Images
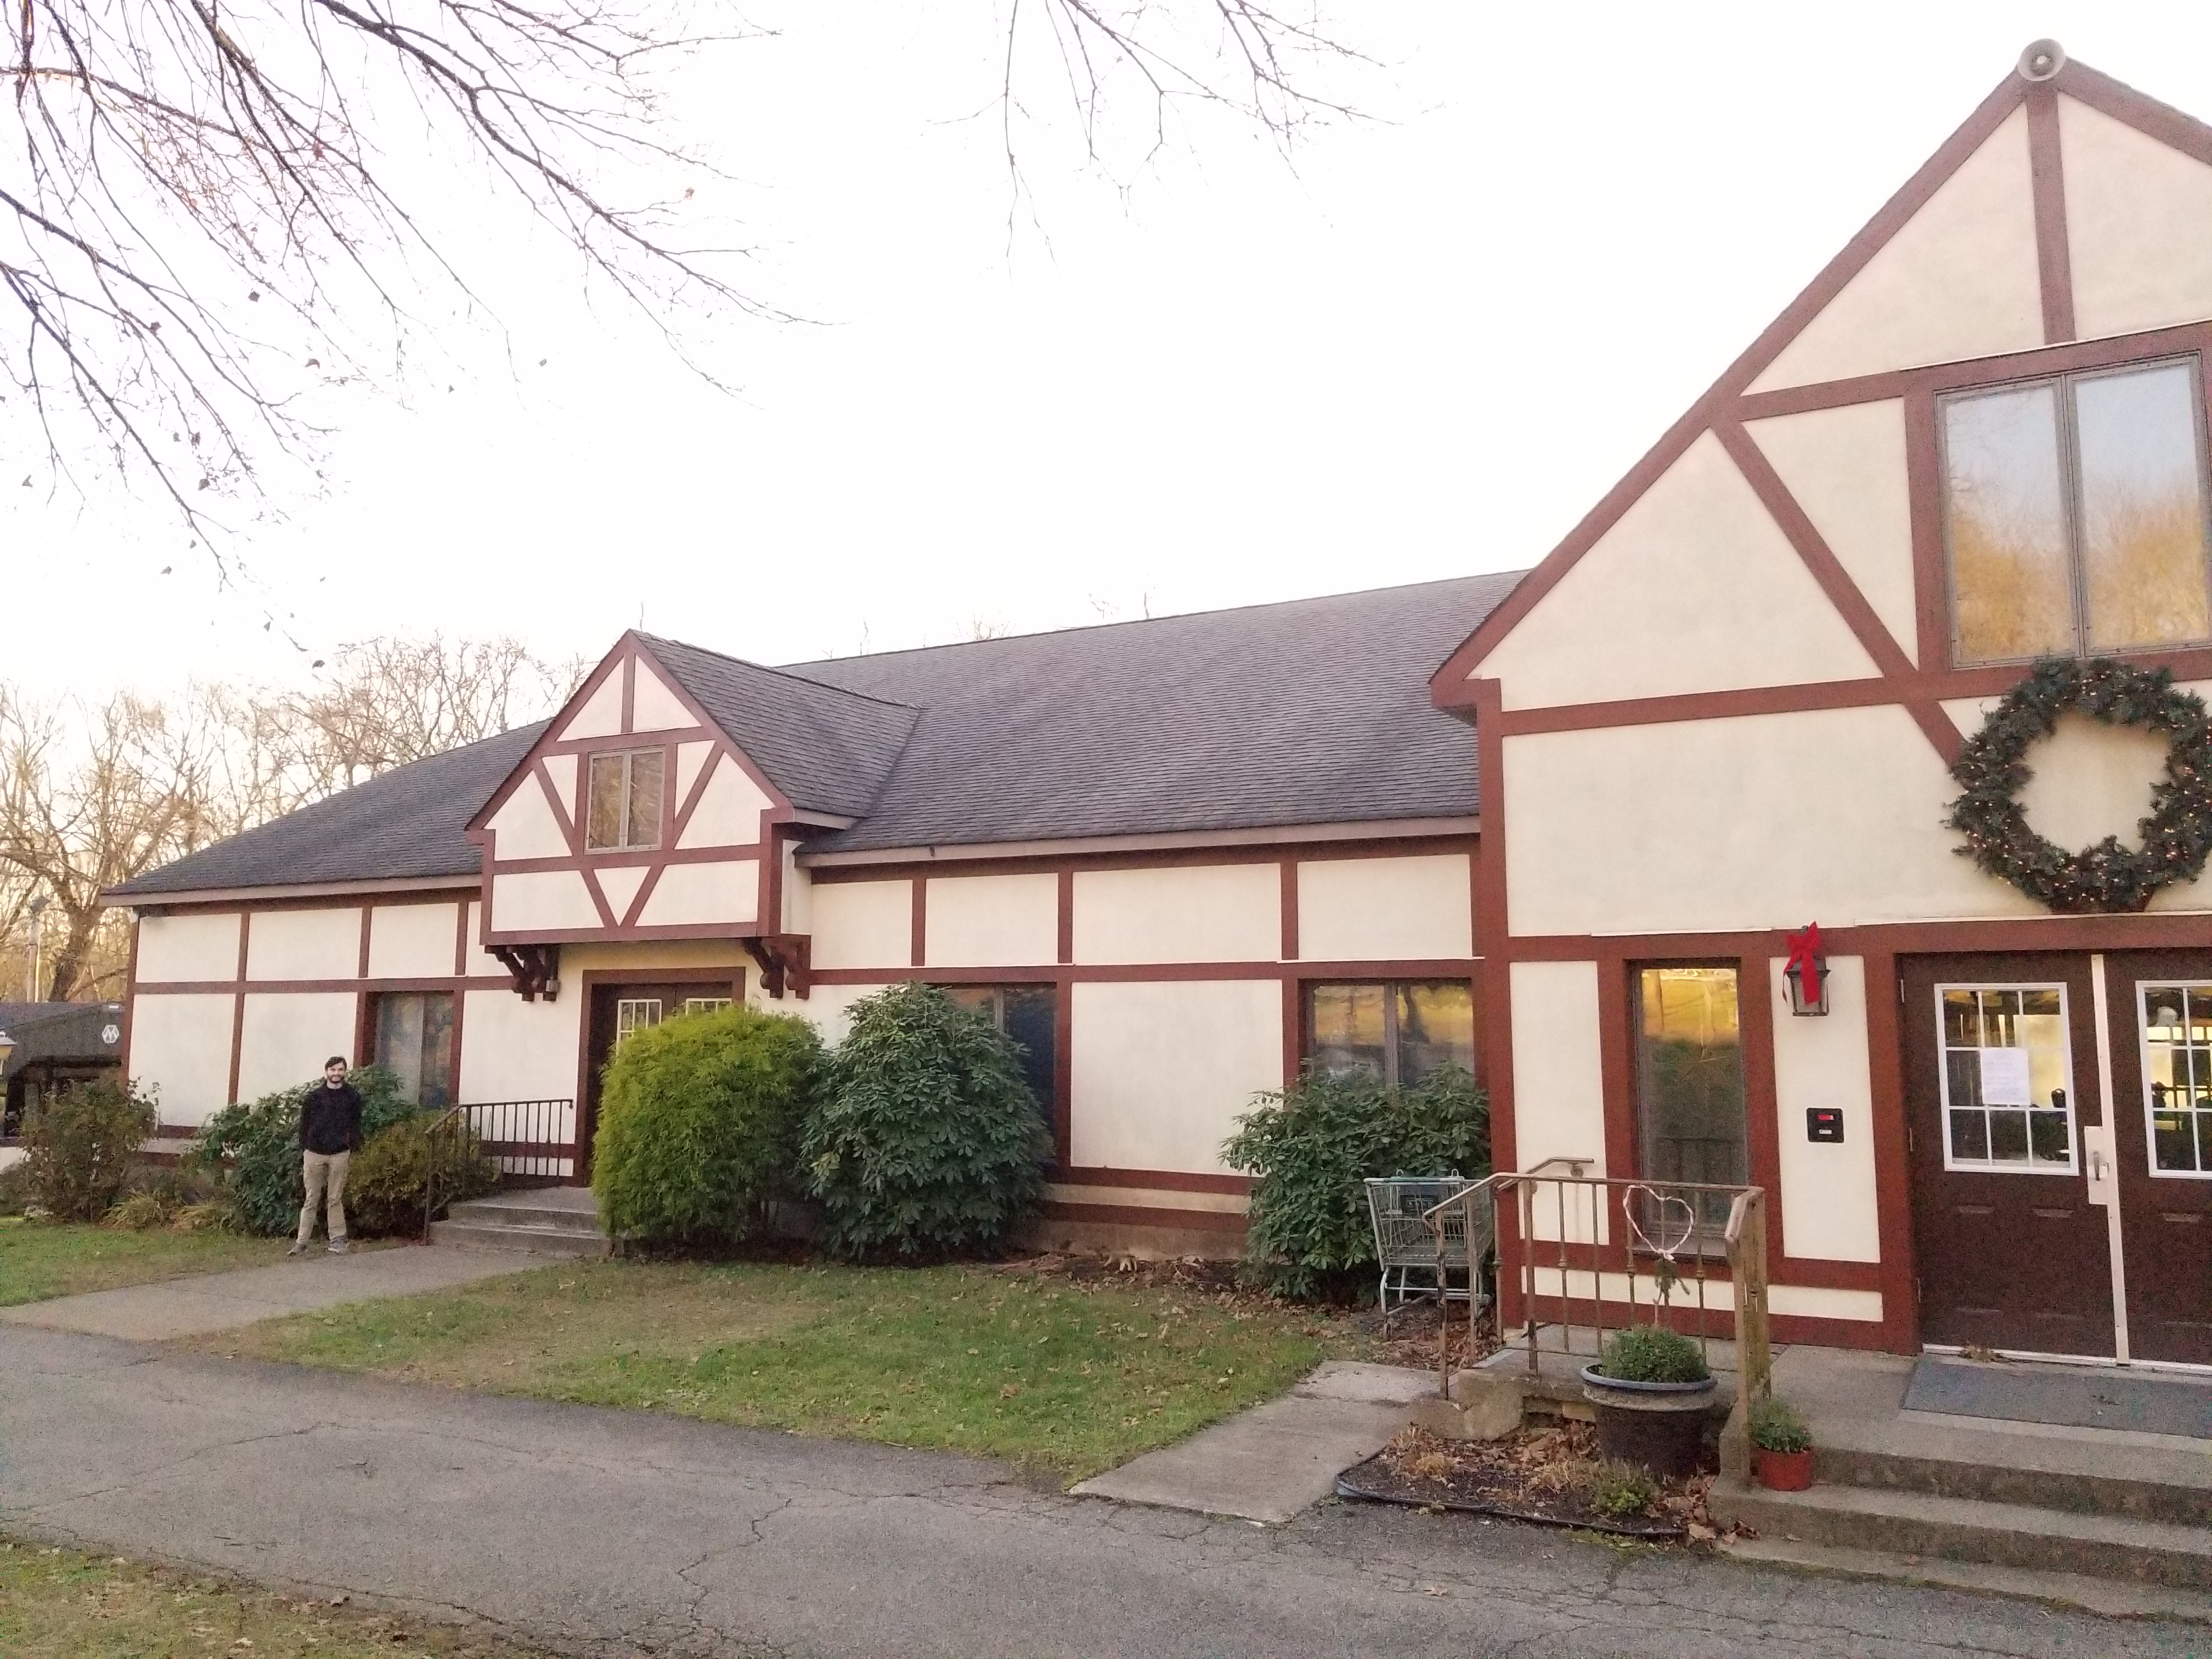
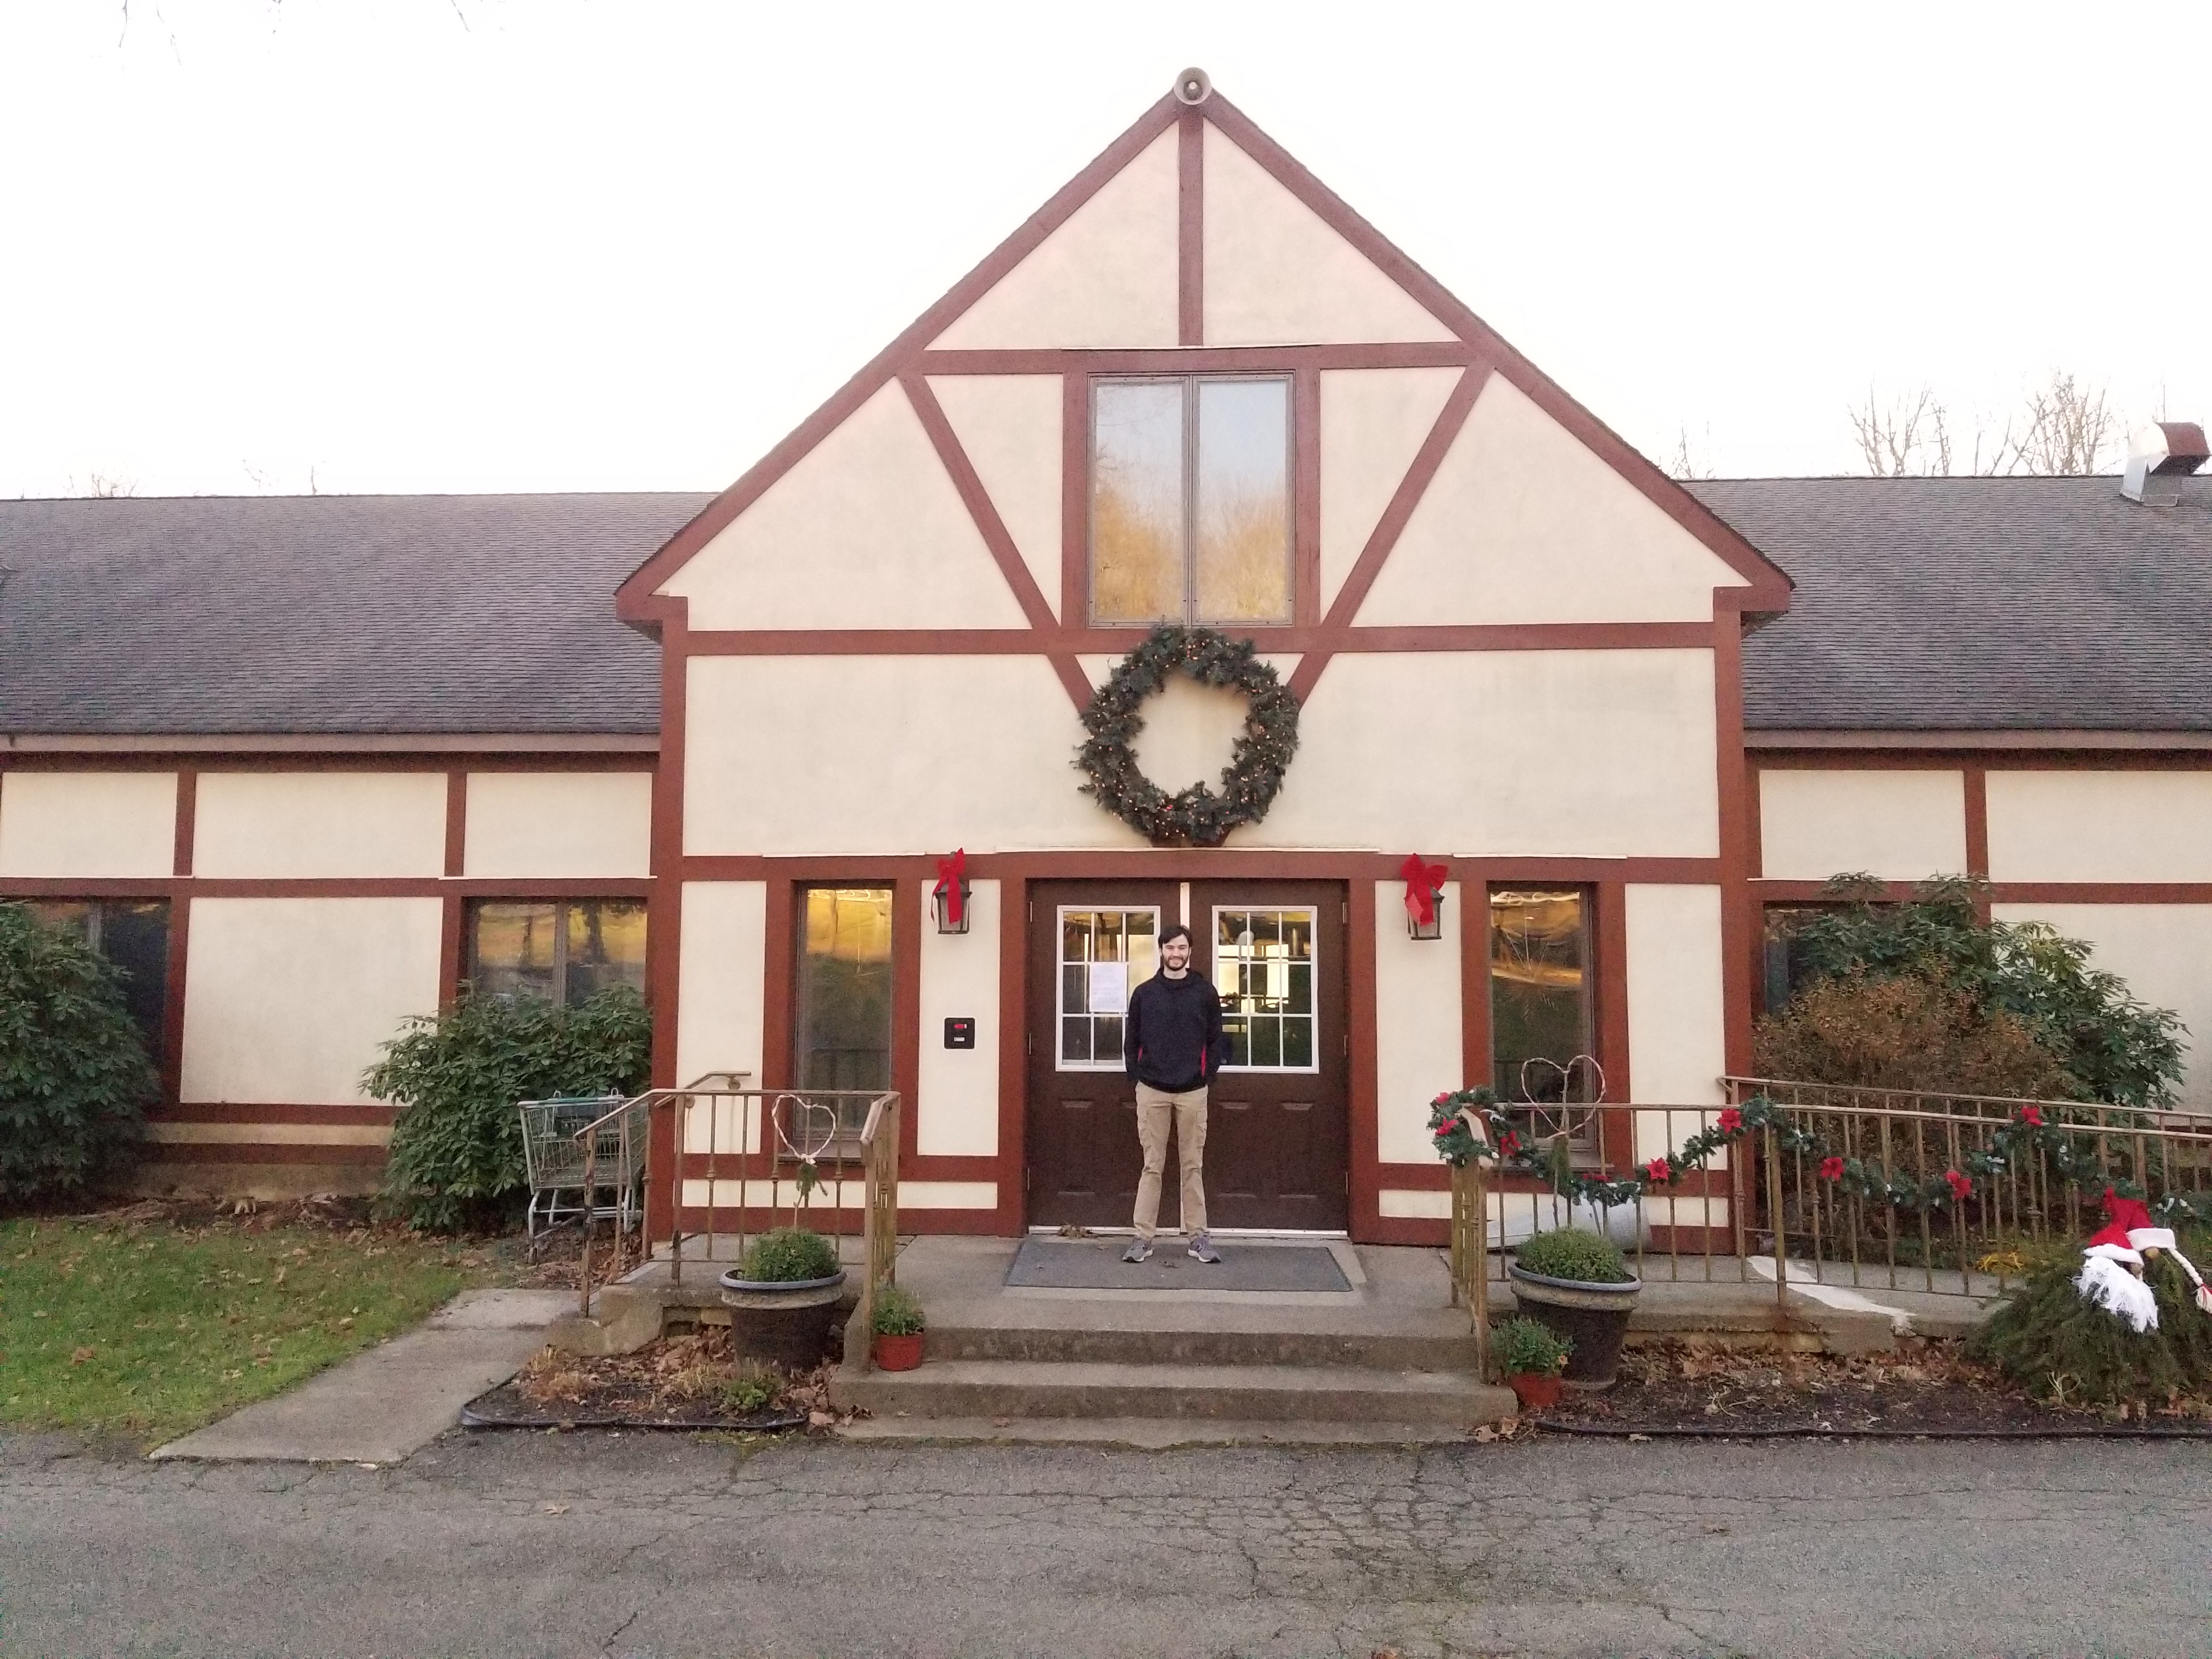
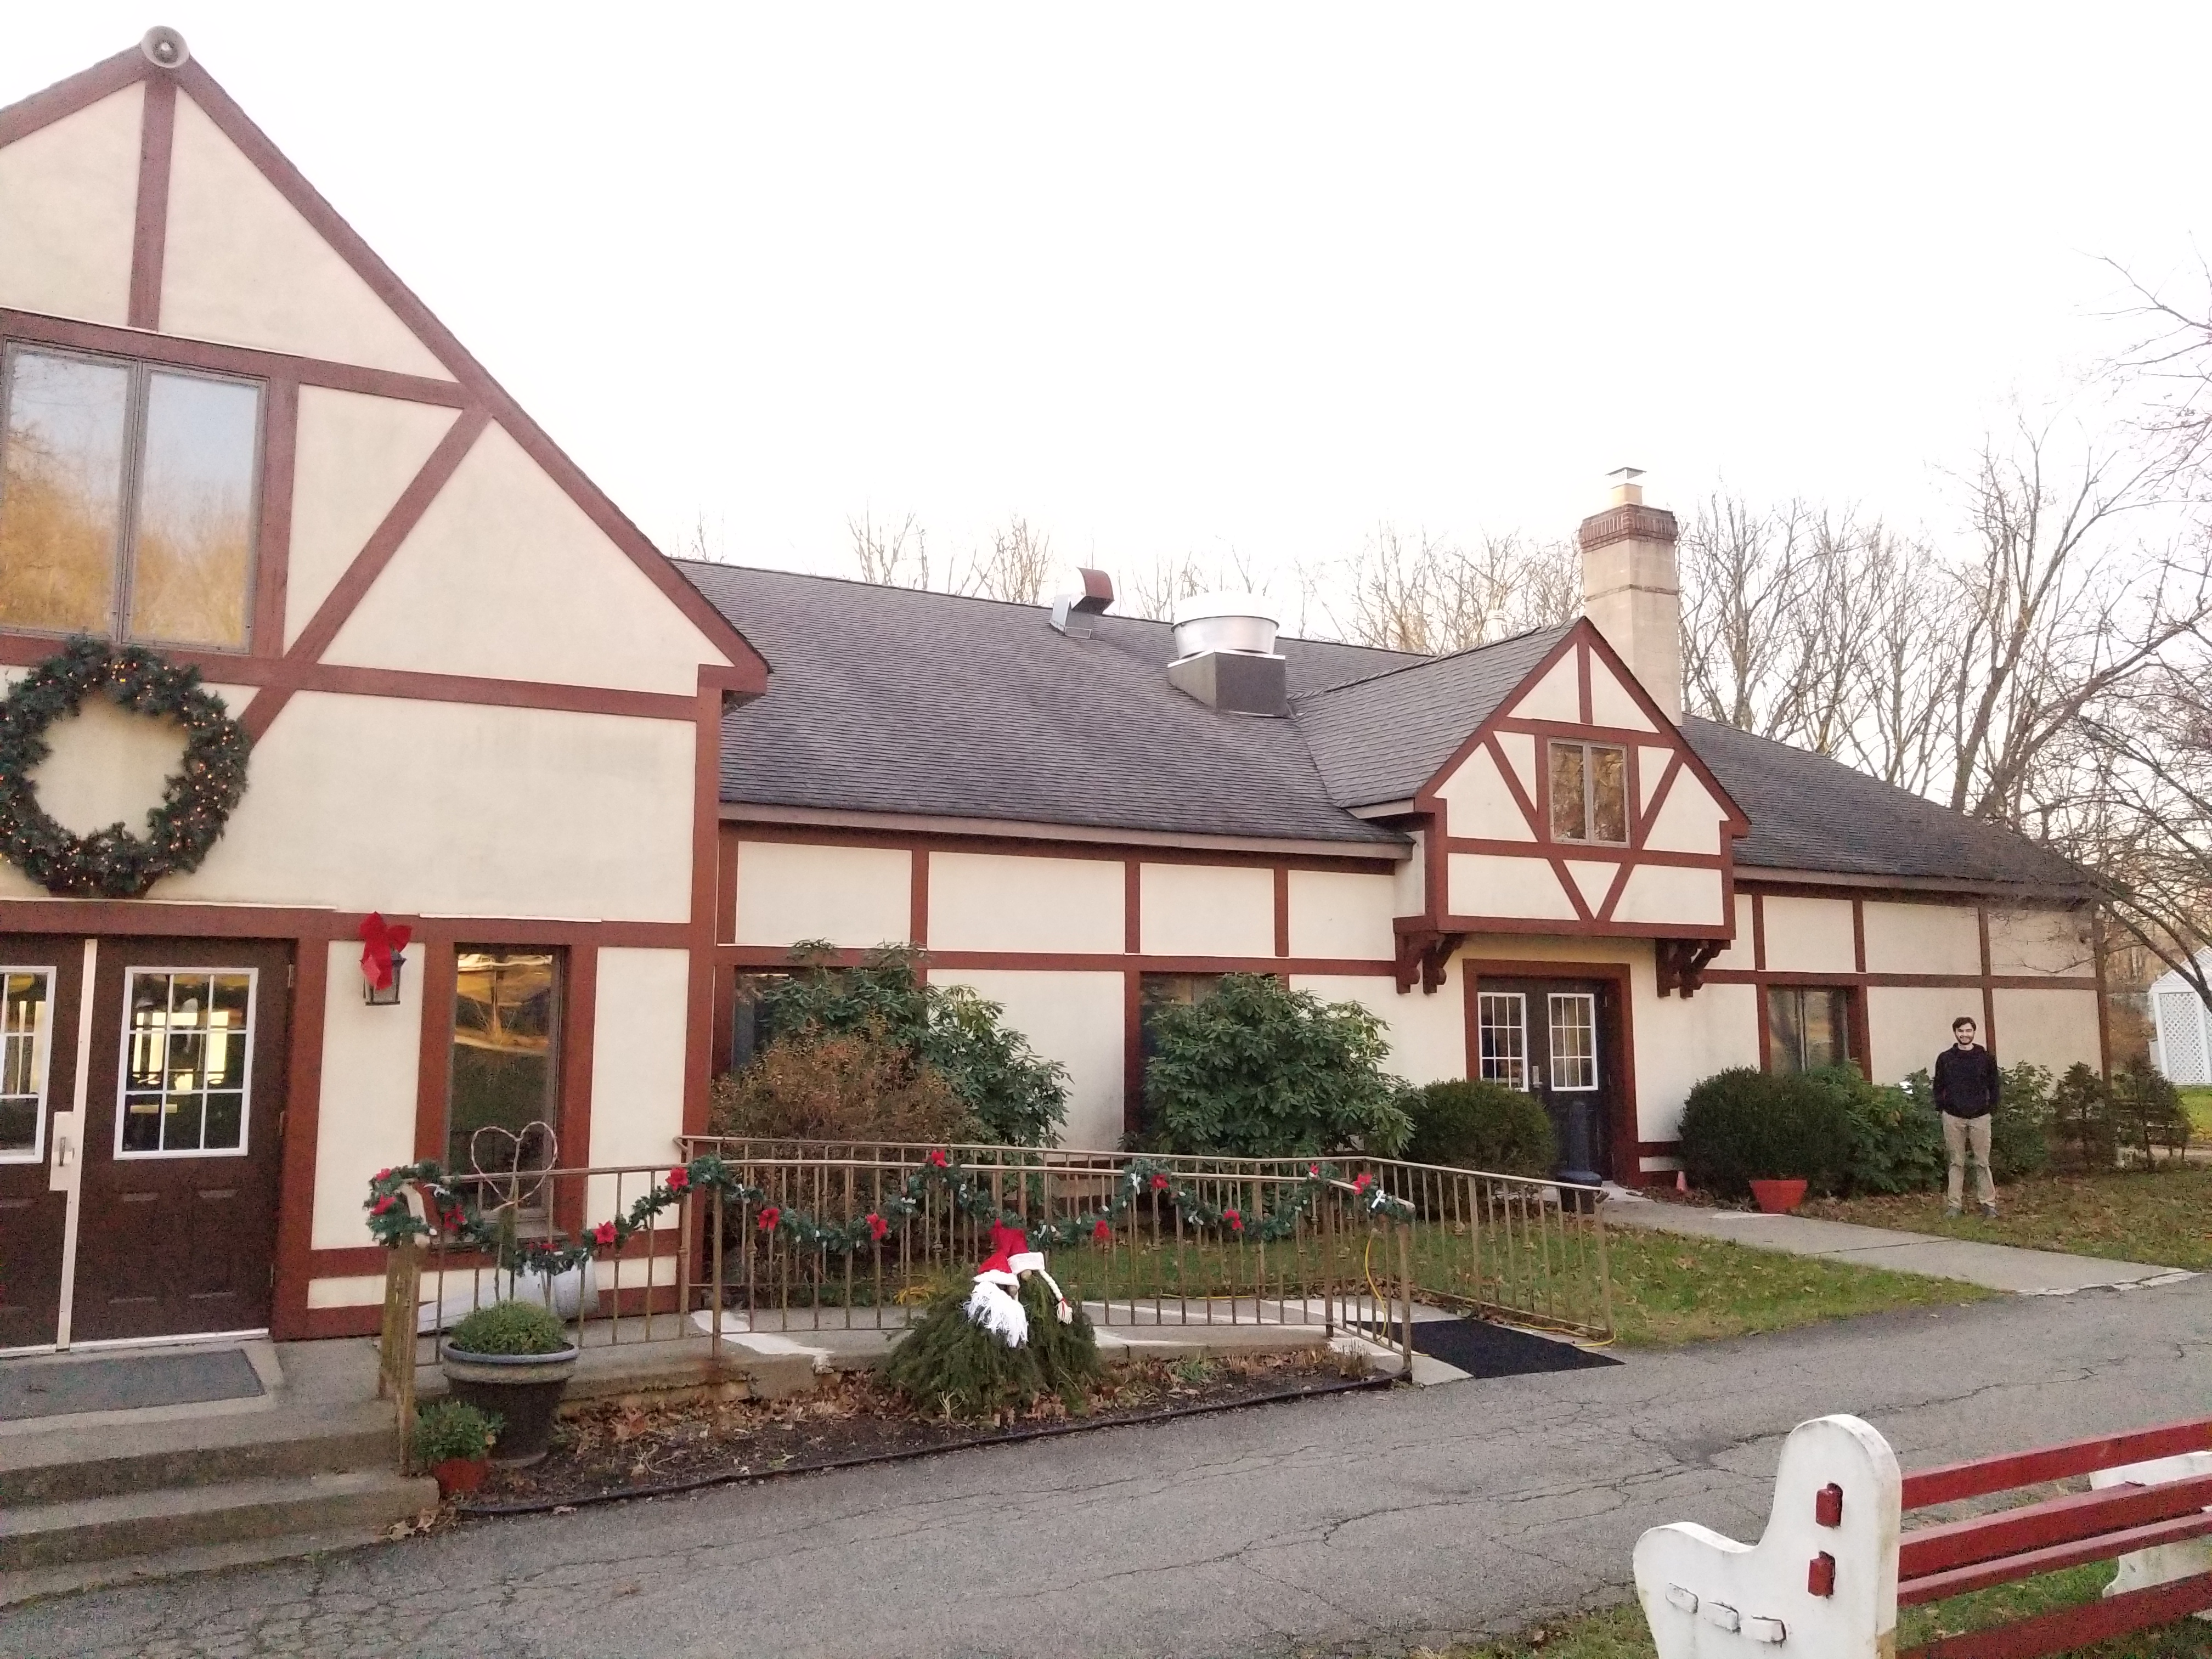
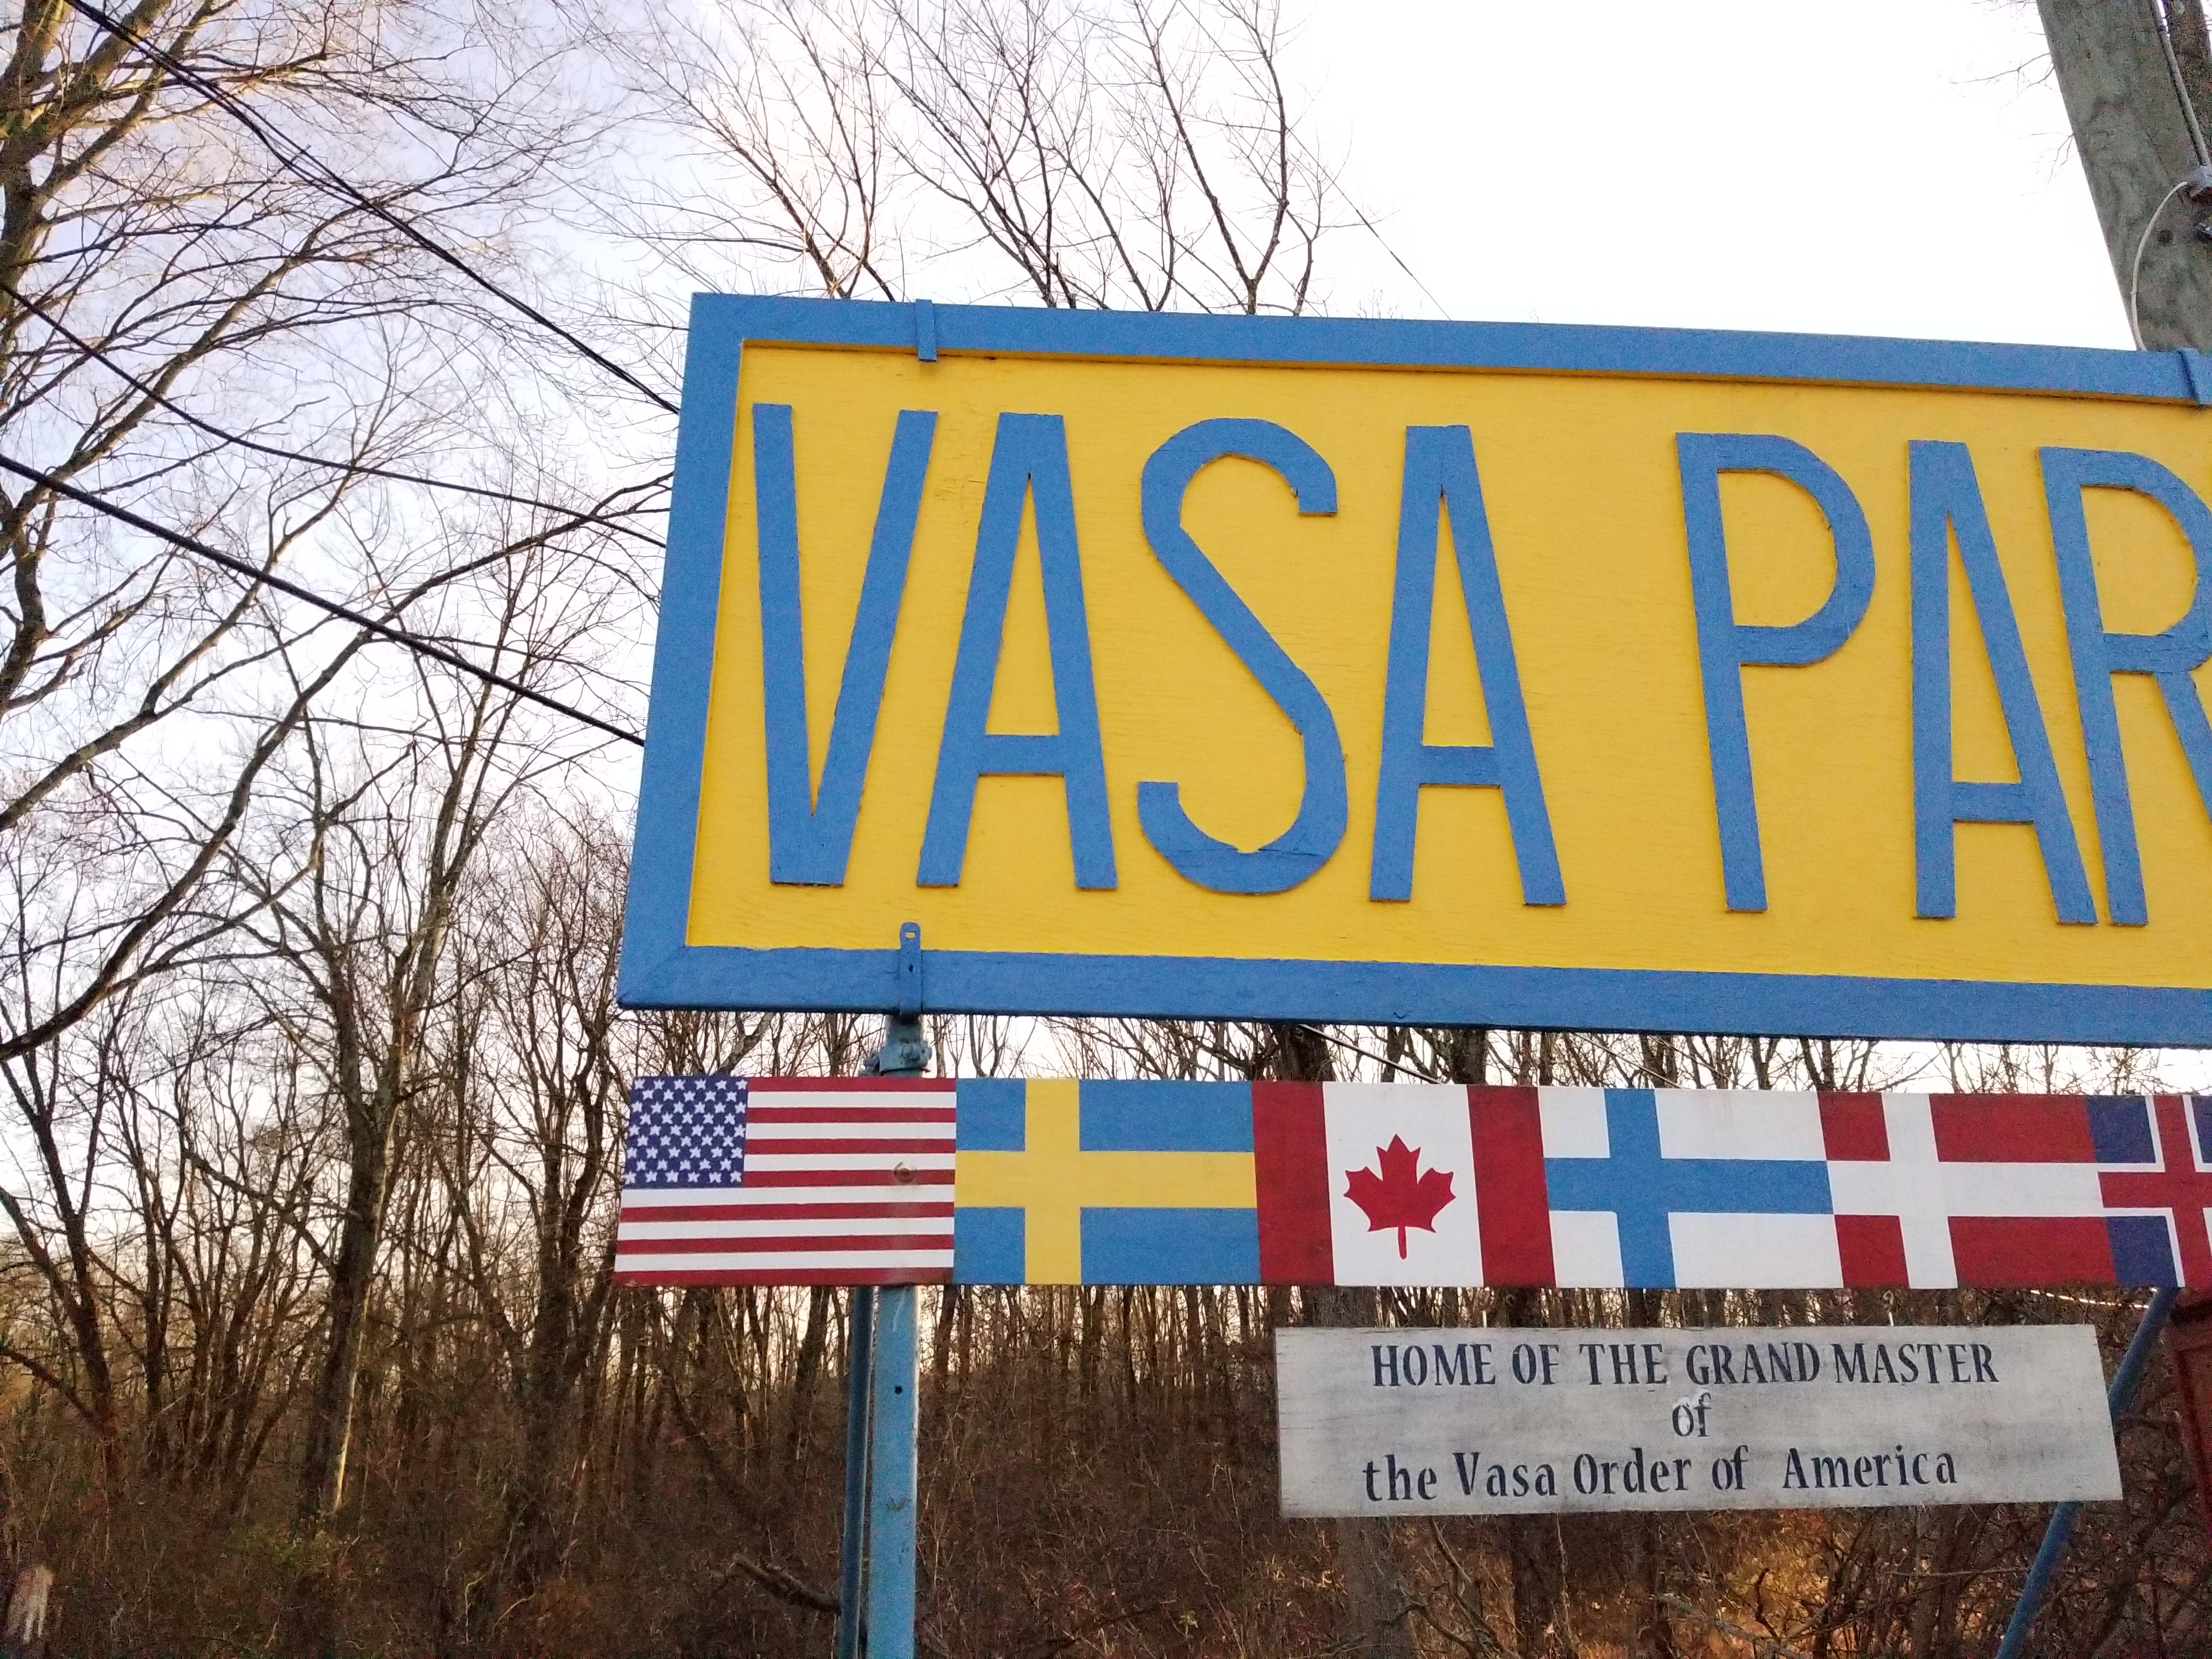
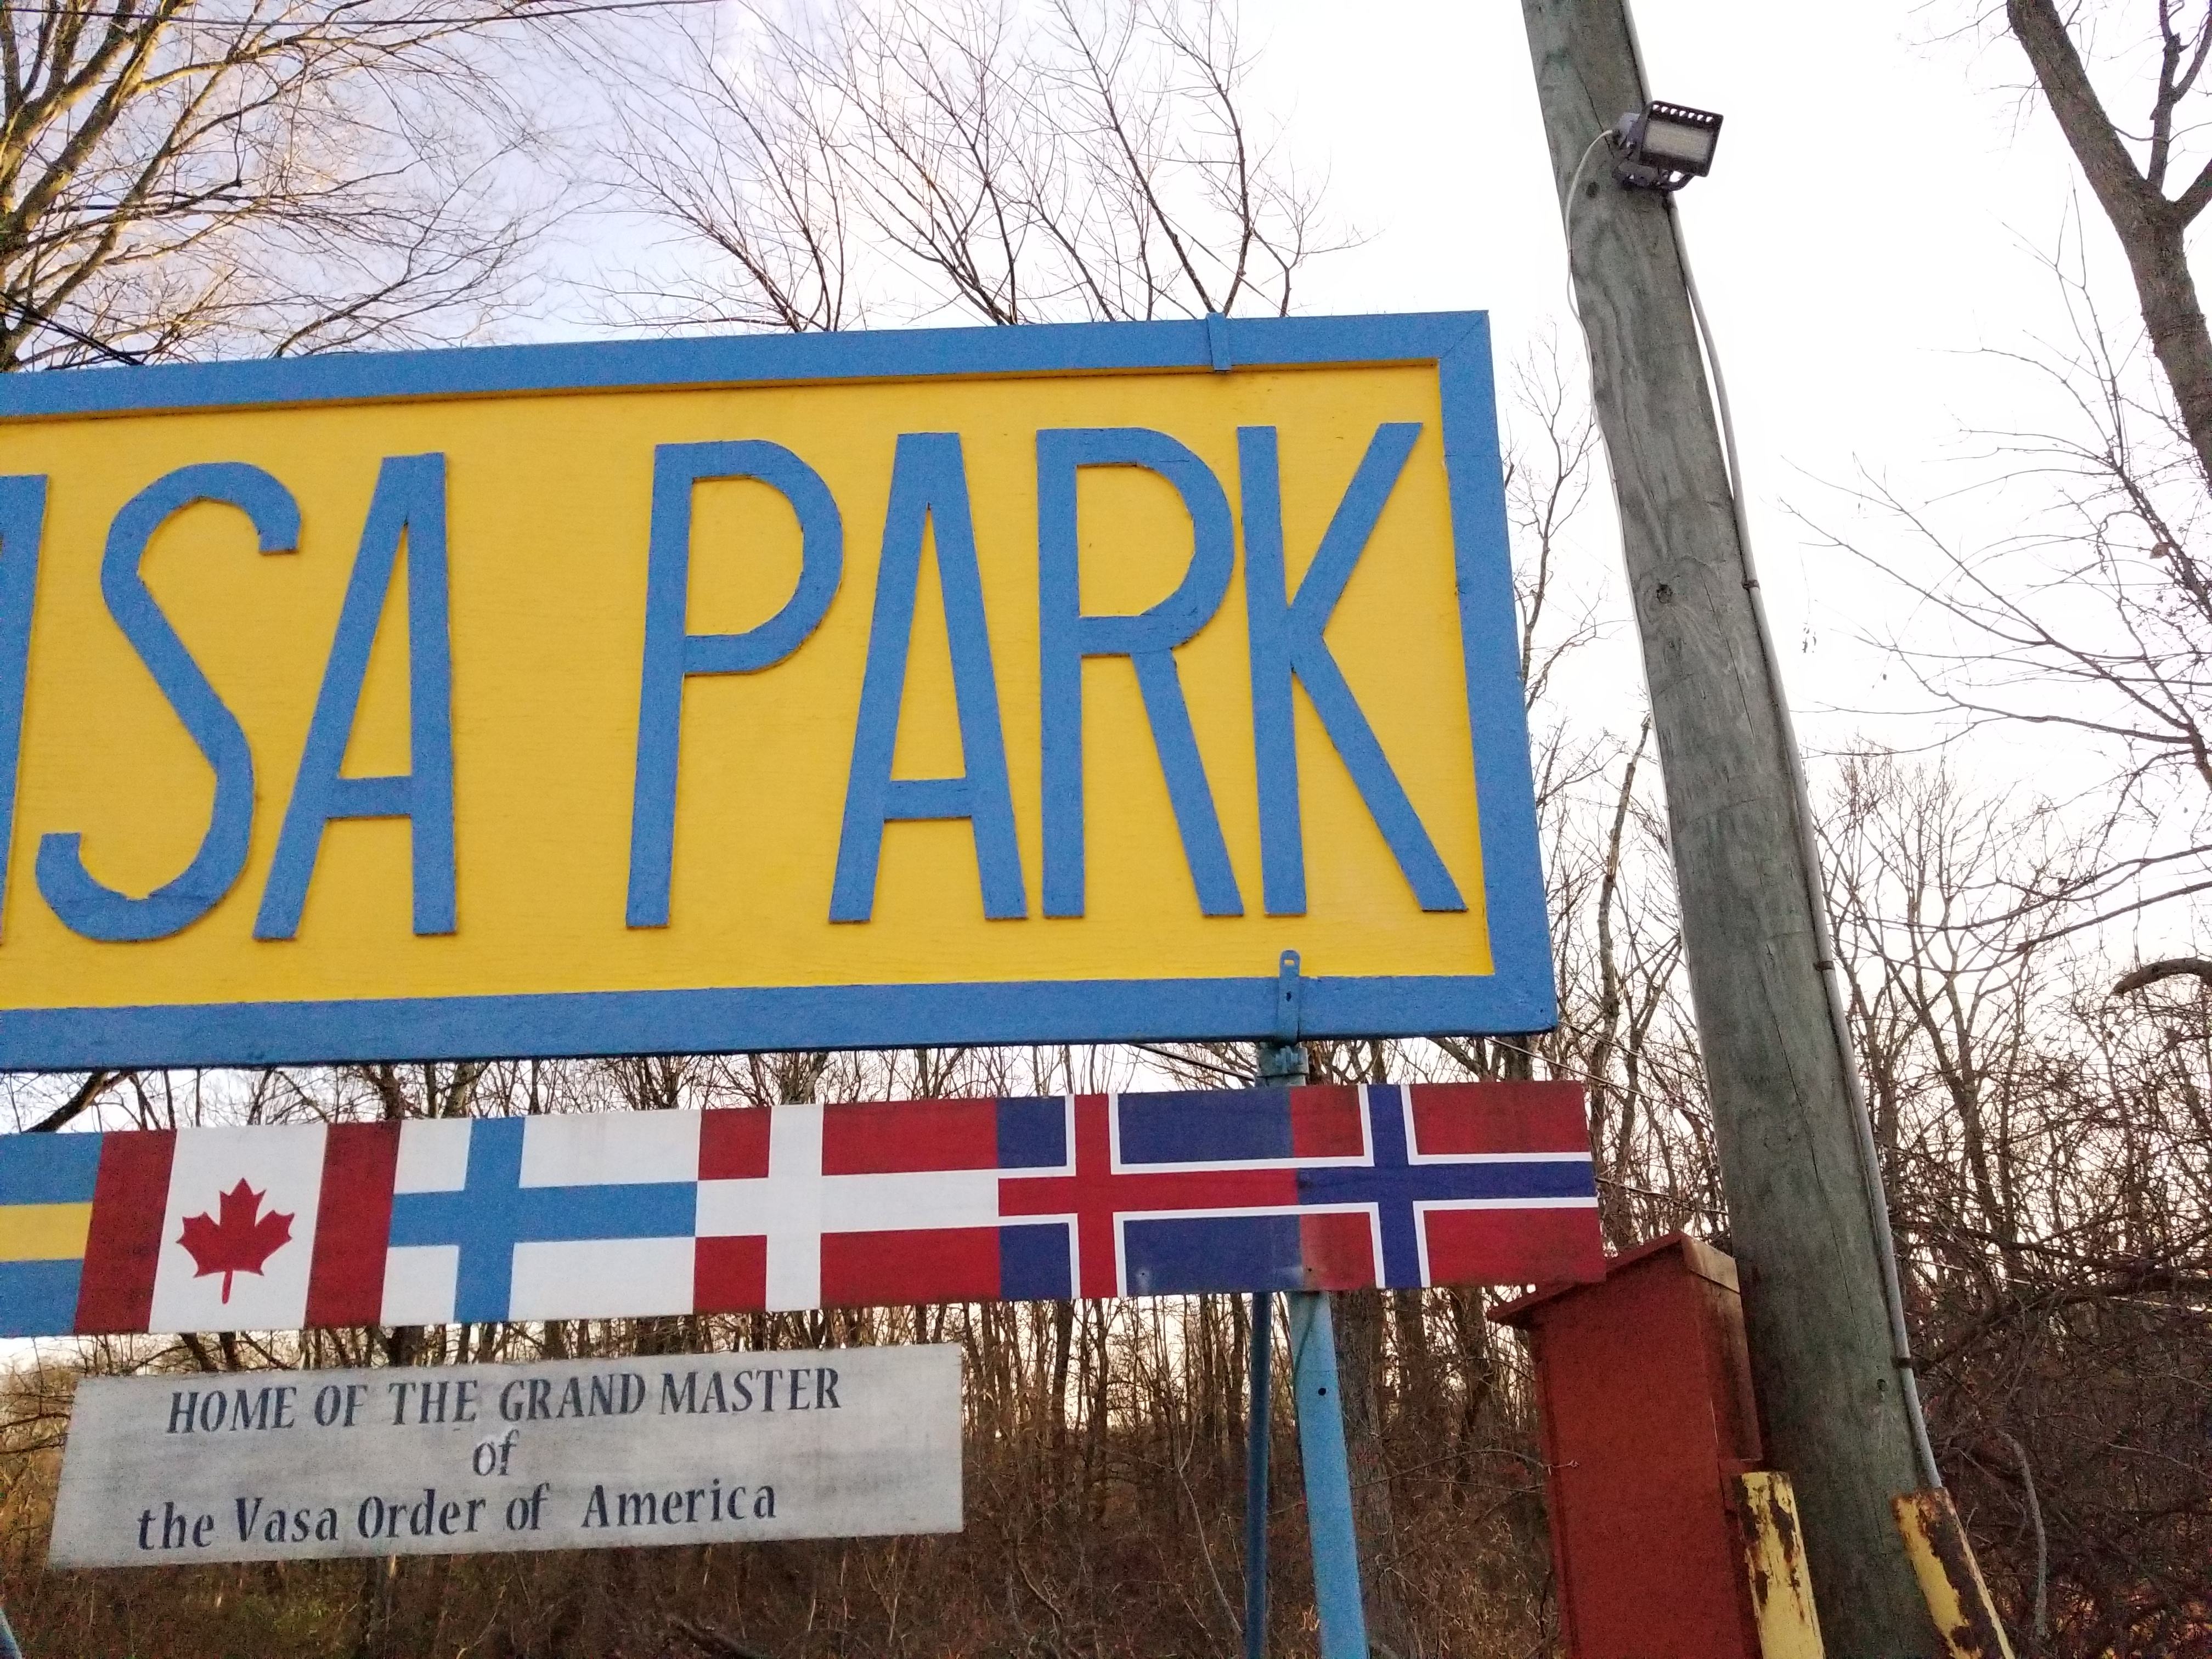
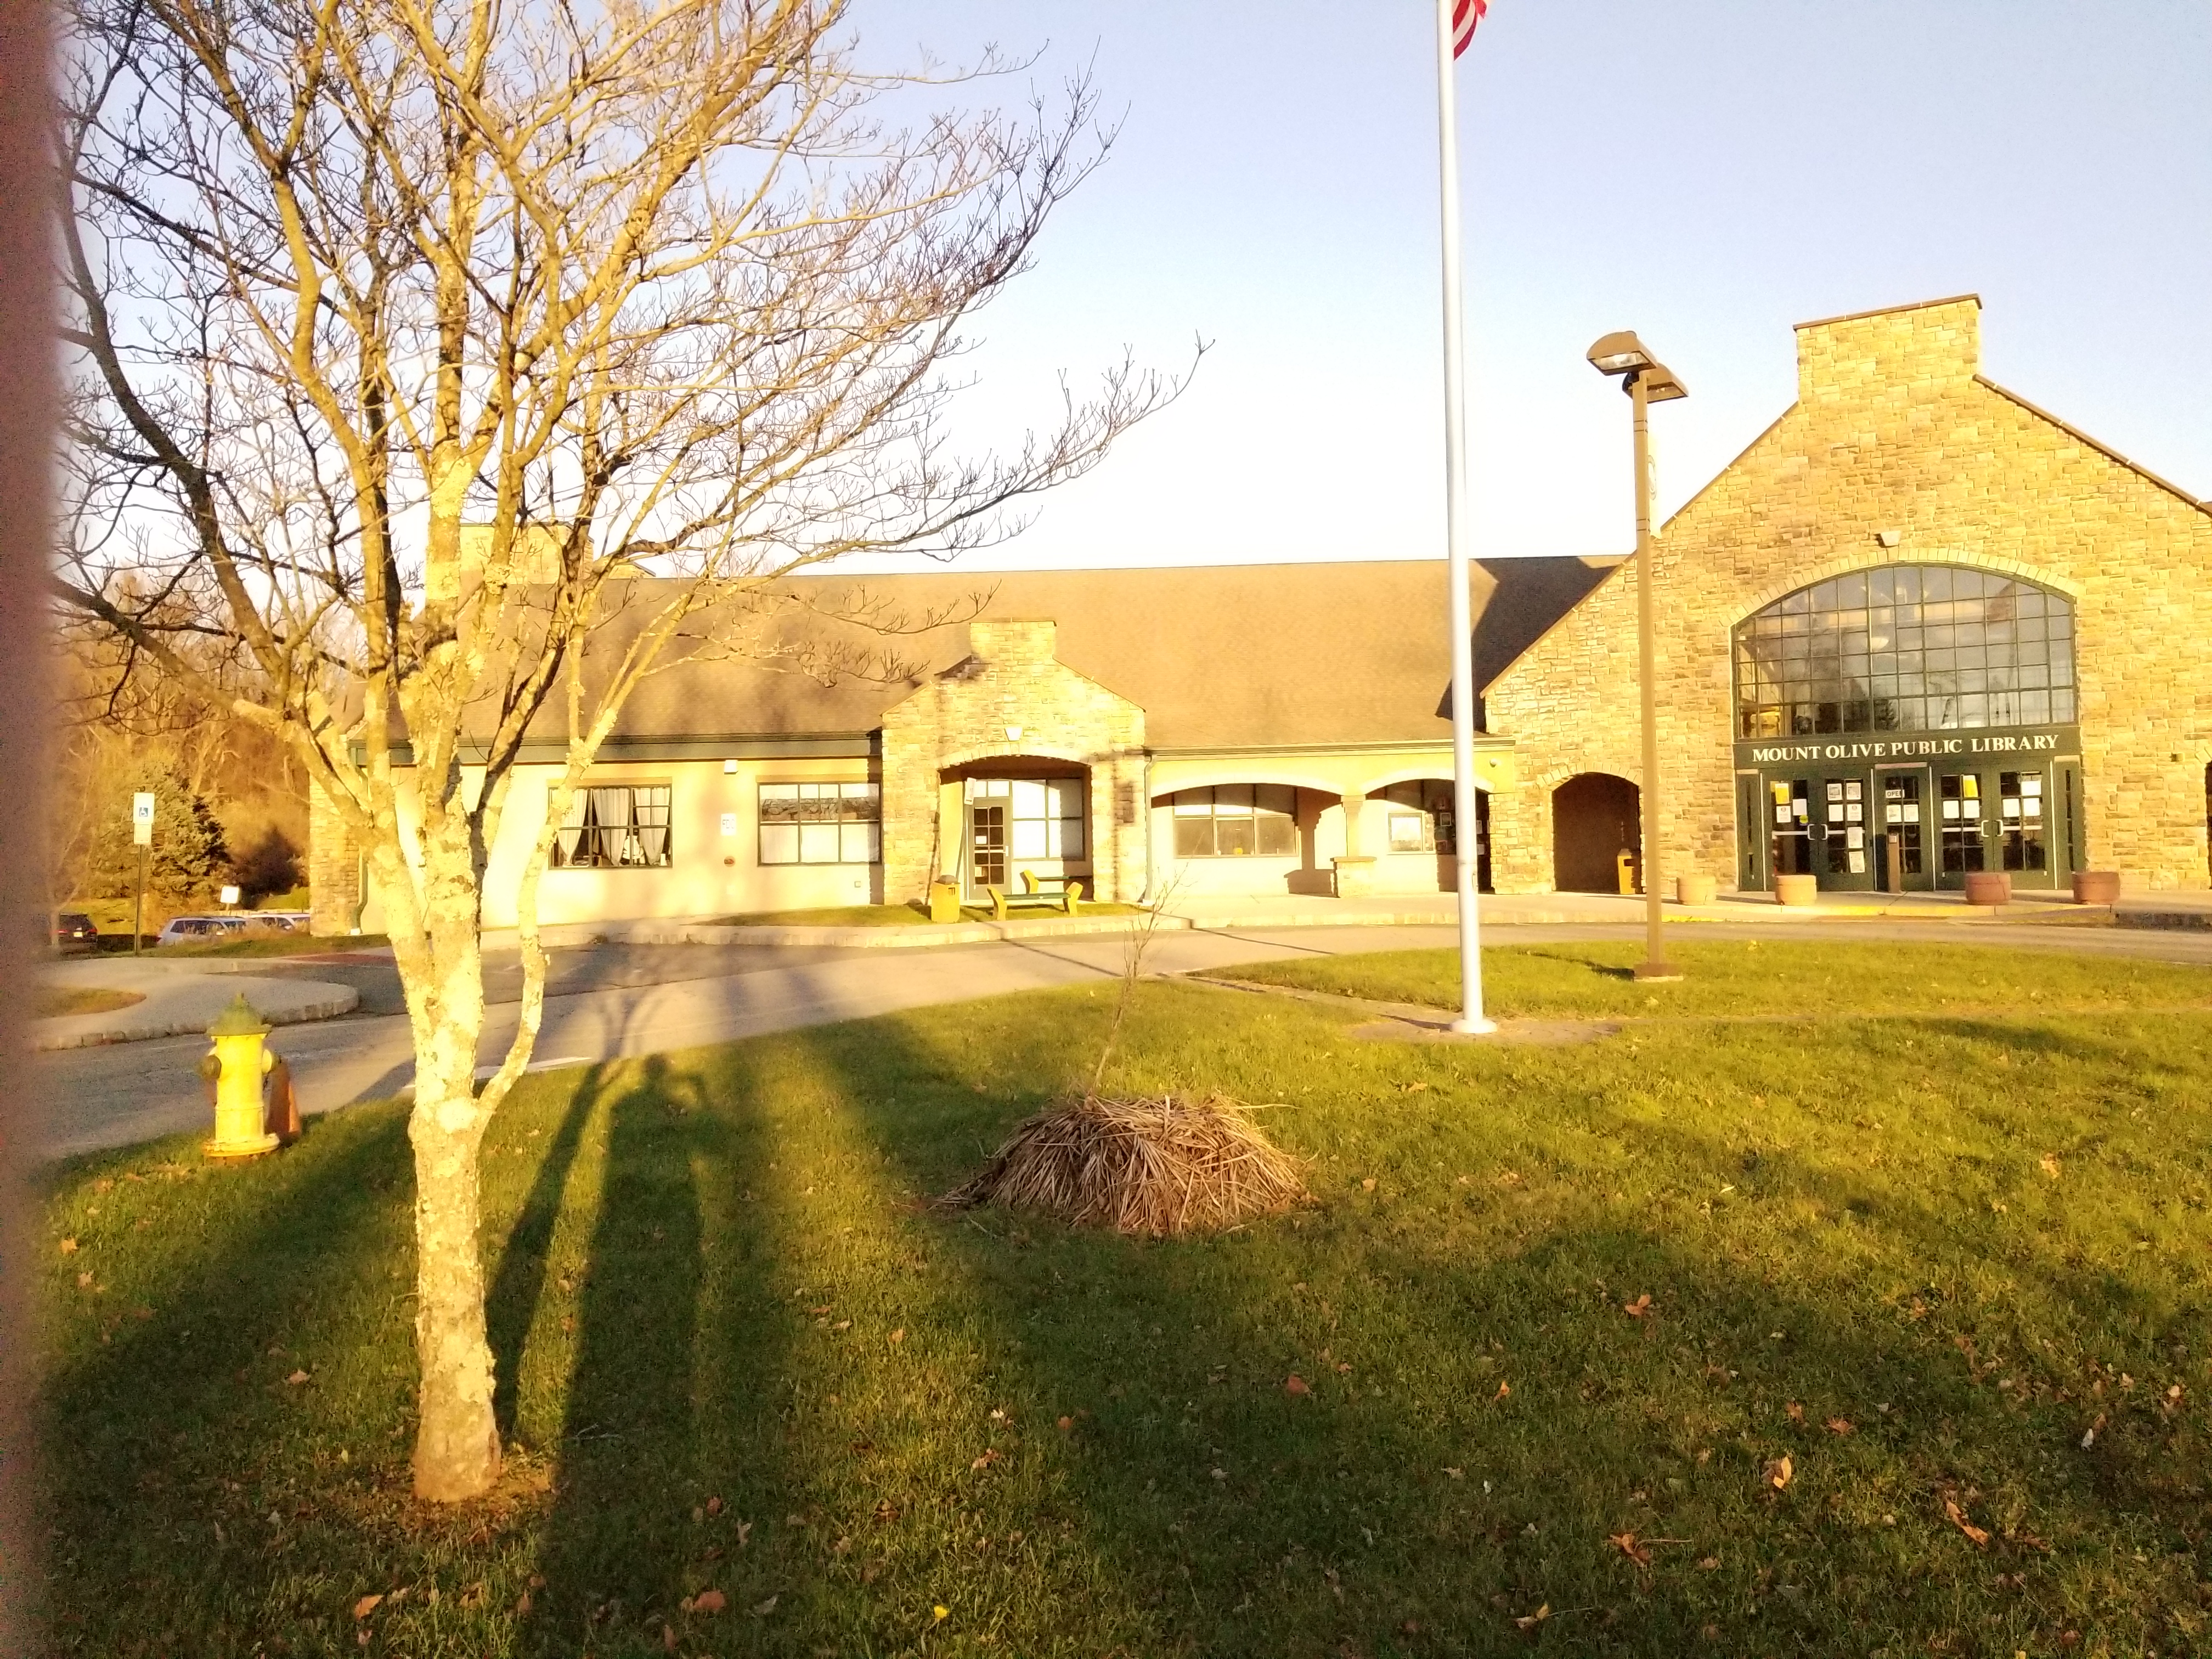
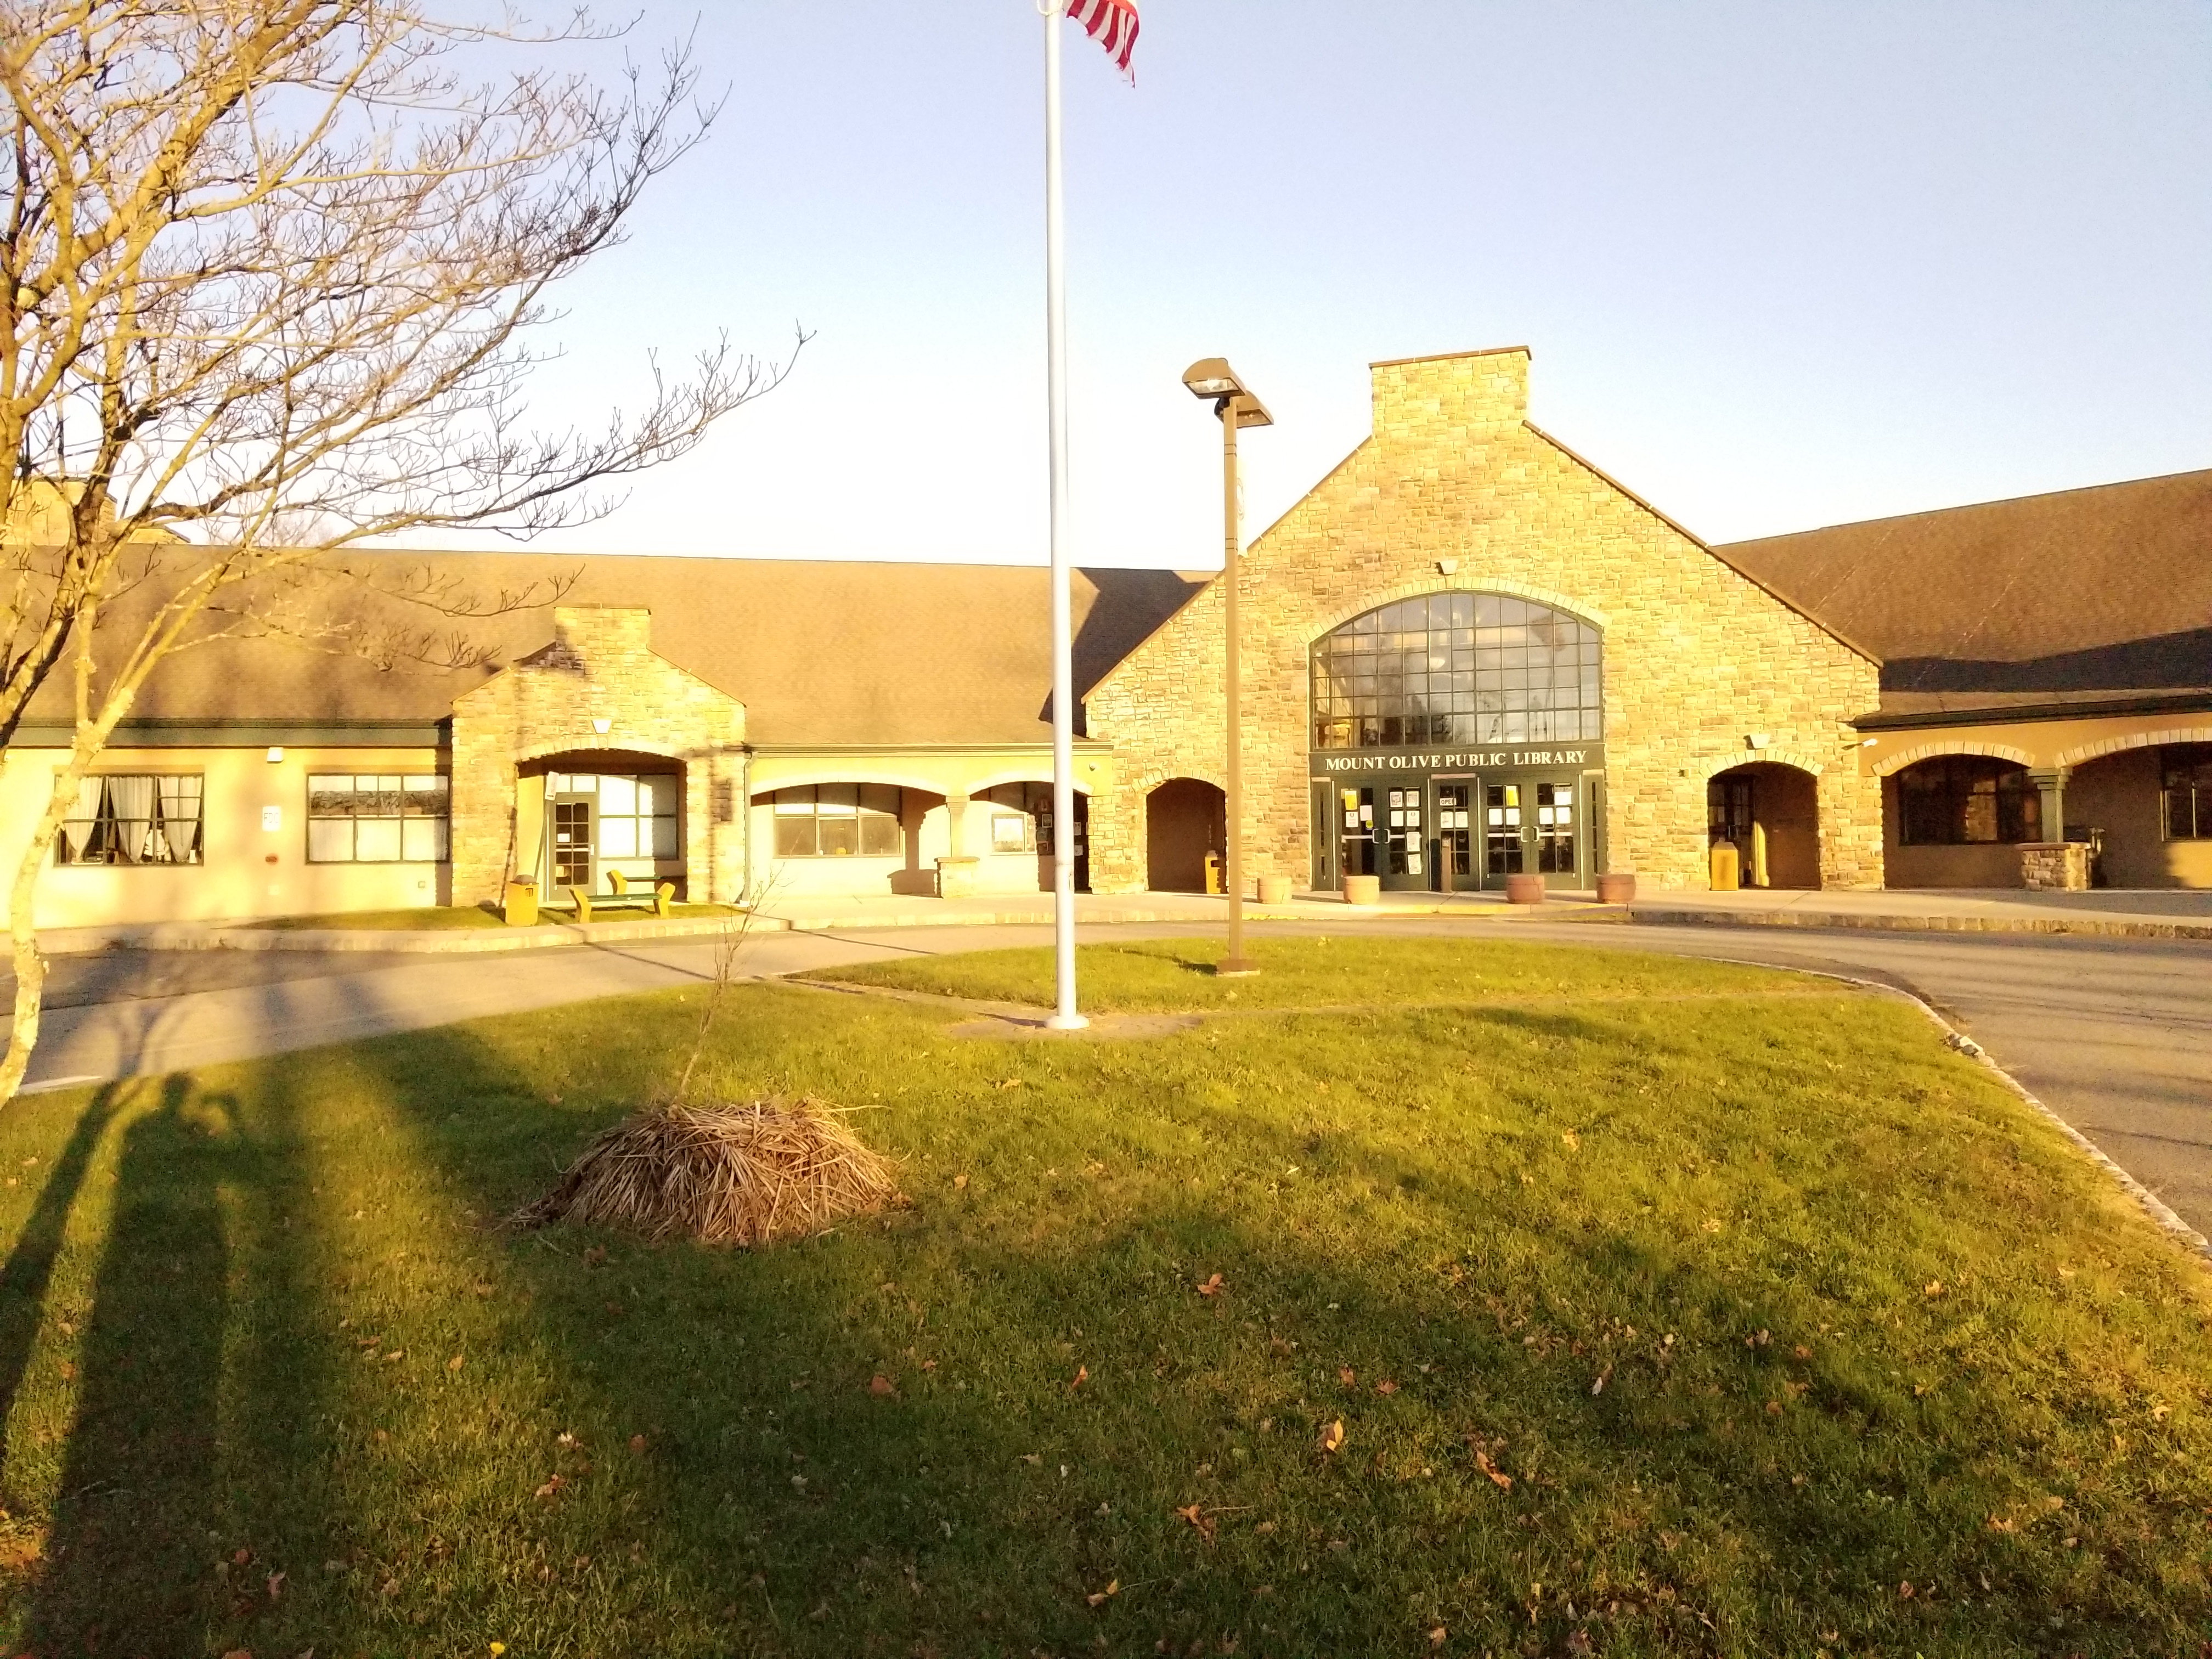
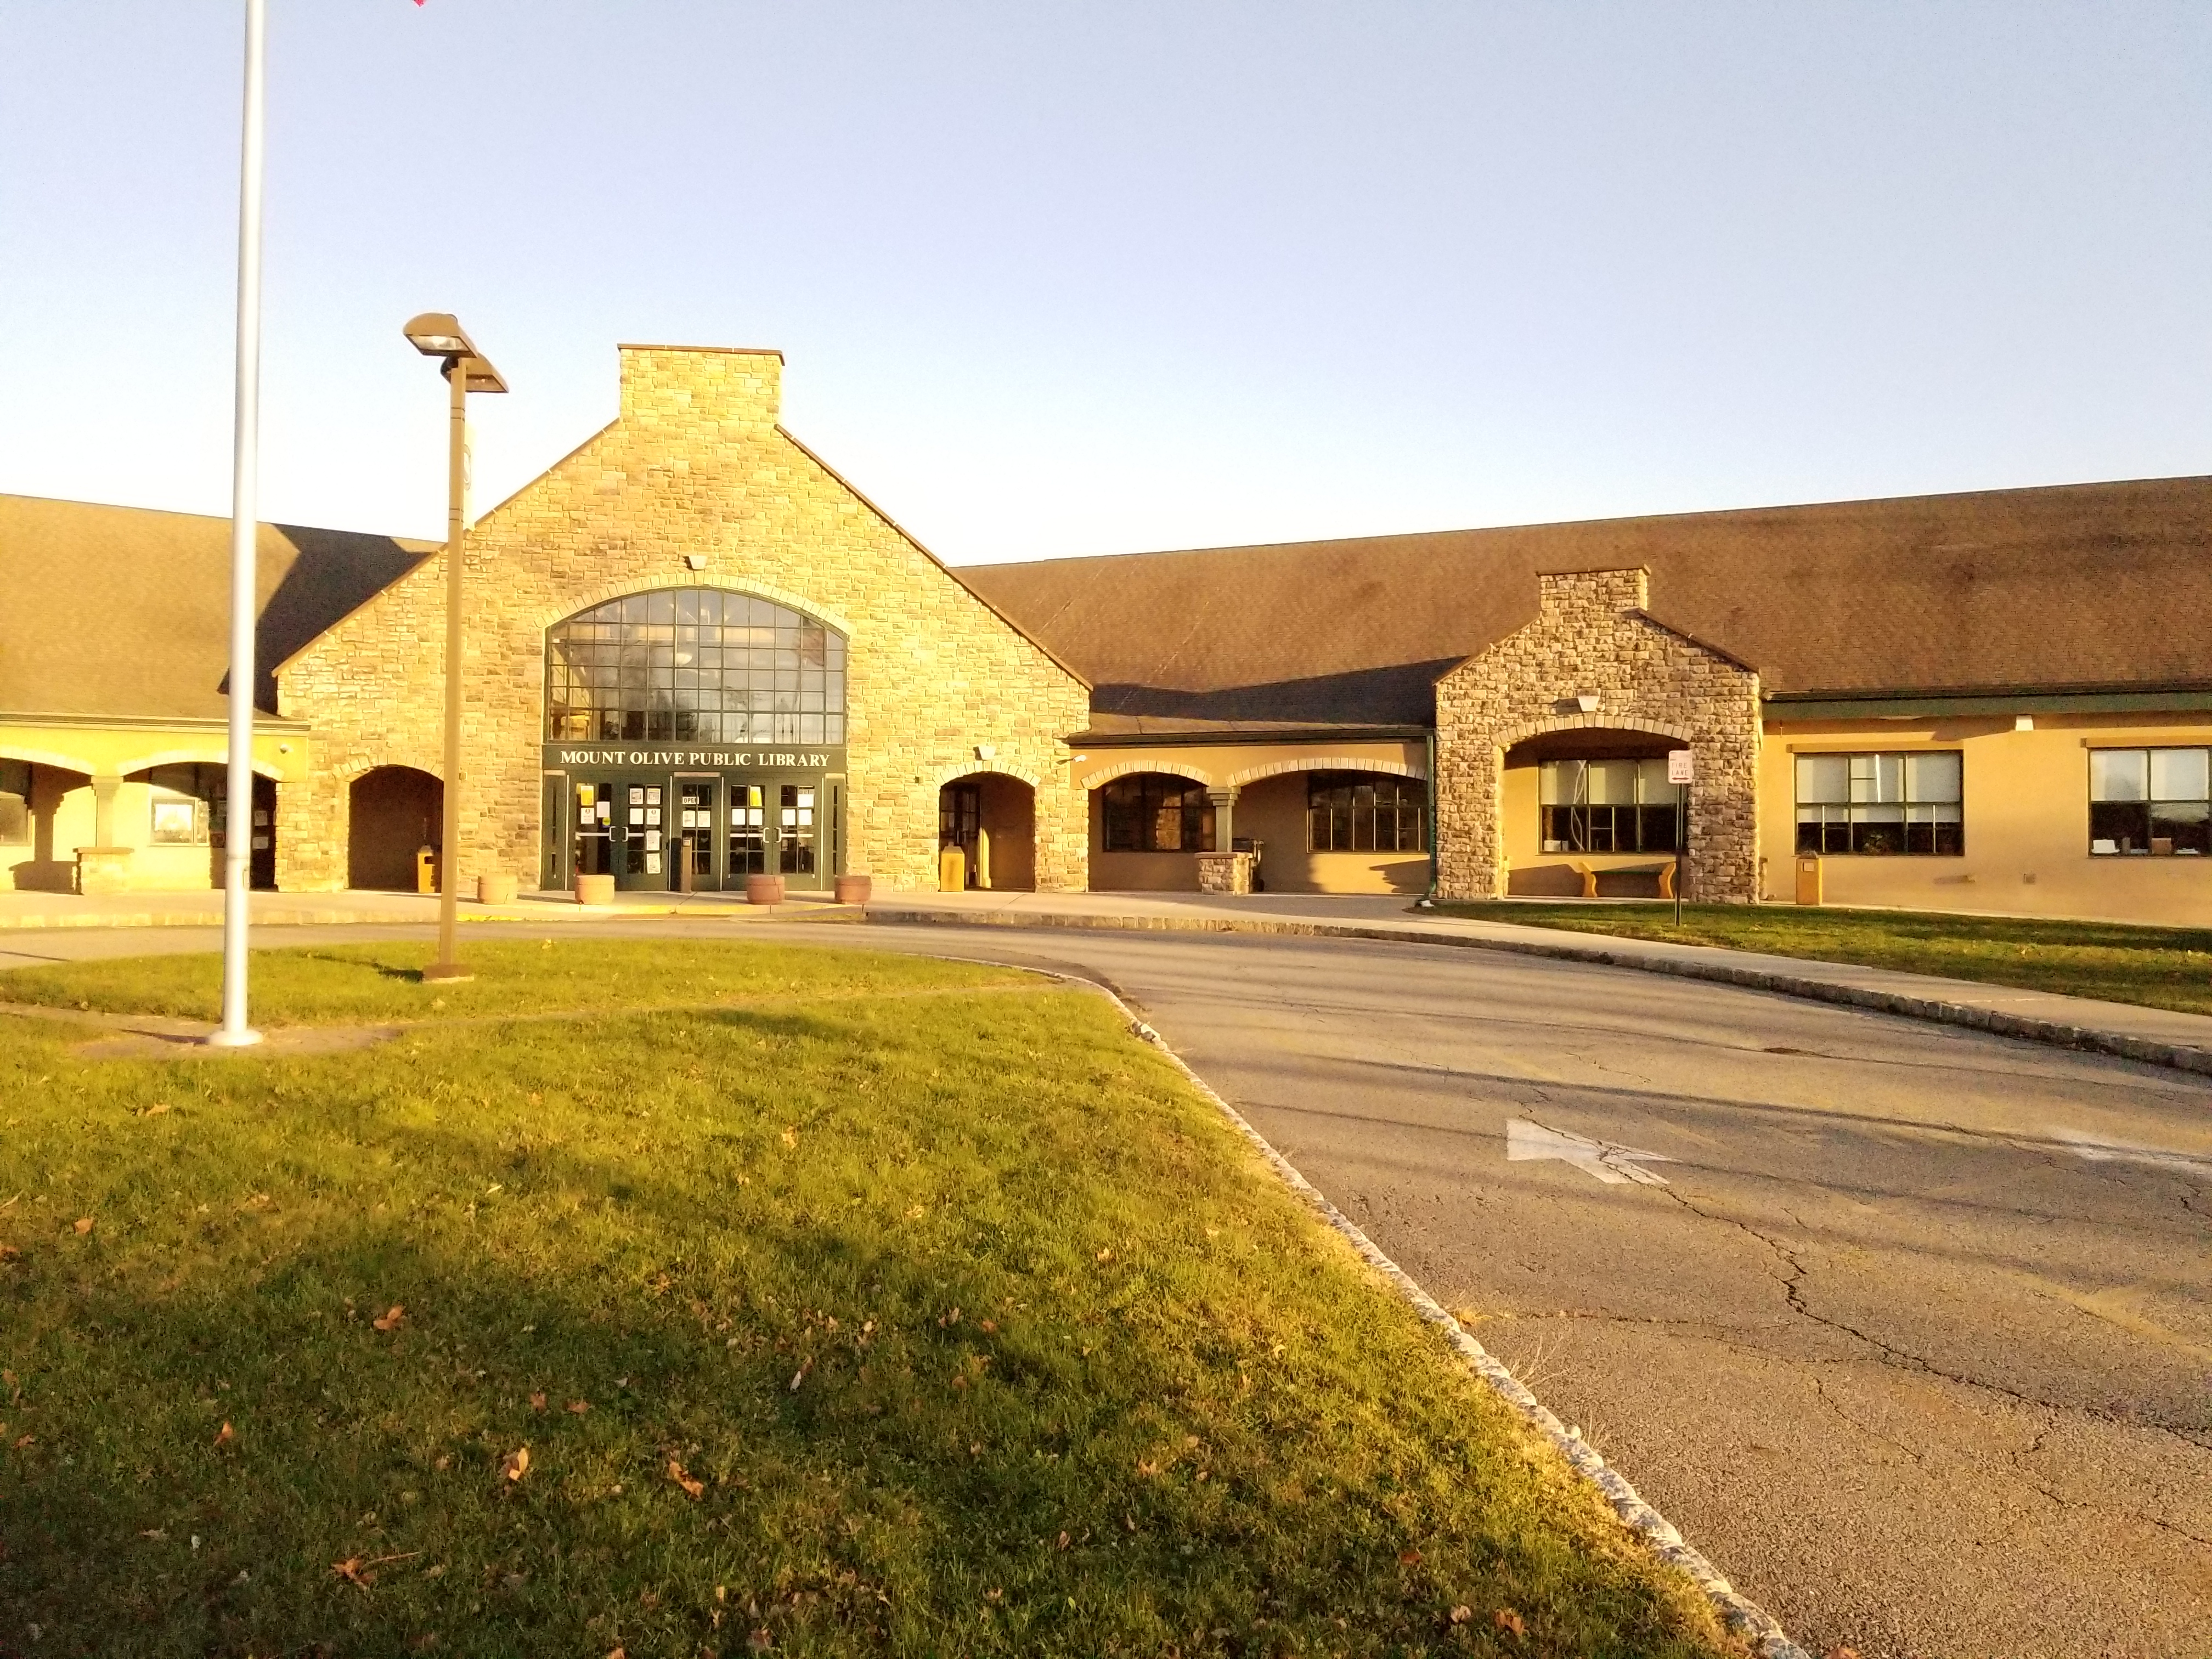
The first step was to shoot the pictures that would be used to make the mosaics. To get these pictures, I went around my town to find buildings with lots of corners and large signs, and I also shot some photos around my house.
Recover Homographies and Image Warping
Given correspondence points between two images, I need to calculate the homography matrix for the projective warp between the two images in order to warp one image to look like another. The homography matrix we need to recover is shown below:

Since the H matrix only has 8 unknowns, in theory we should only need 4 points to fully compute it. However, this can be very sensitive to error, so we select many points and use least squares to estimate H. I used np.linalg.lstsq() to compute an estimate for H
Image Rectification
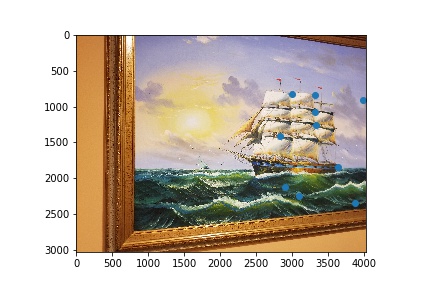
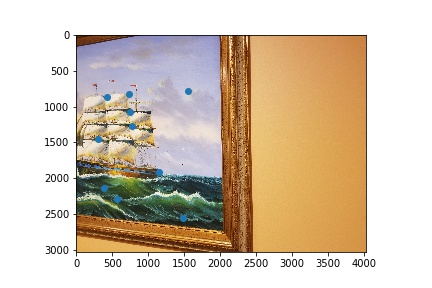
Here I take an image of a surface that was taken at an angle and warp it so that it looks like it is facing the camera. I selected four points for each of the objects in the input photos, and then selected the desired shape for the output. Then, I computed a homography and warped the images so the shape of the selected points matched the shape of the desired points. For each of these, the four points selected were the corners of the object
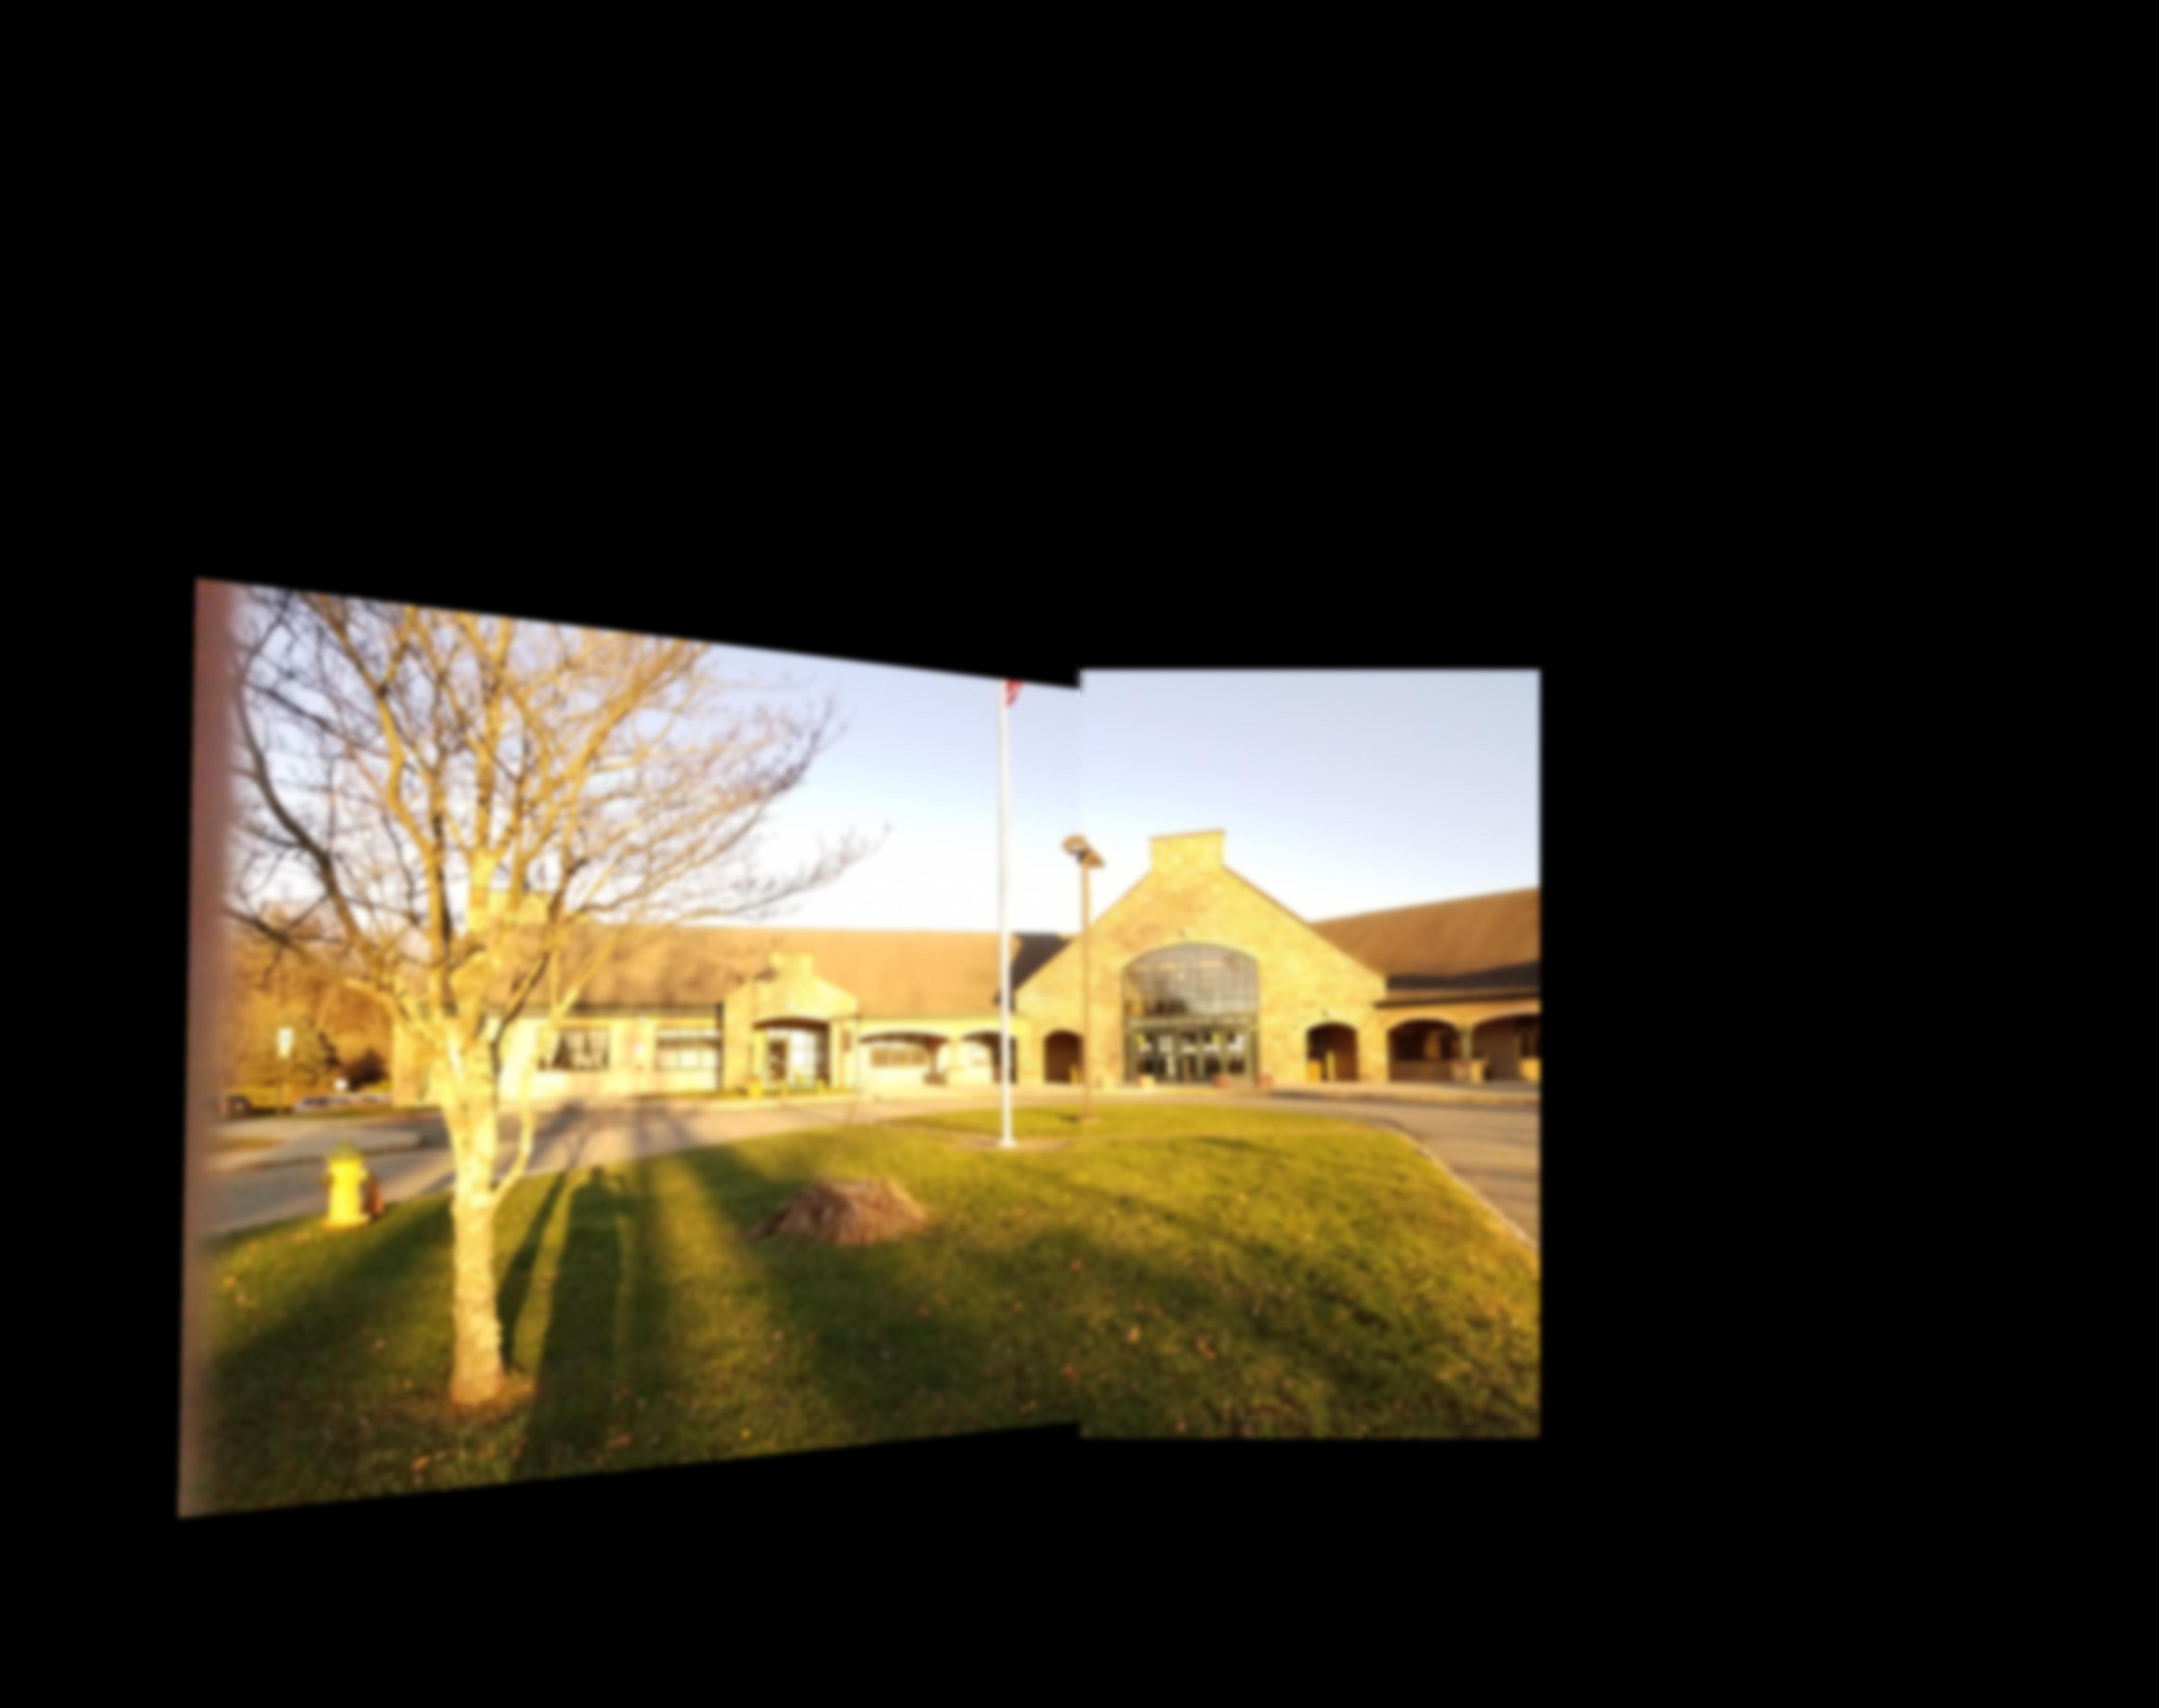
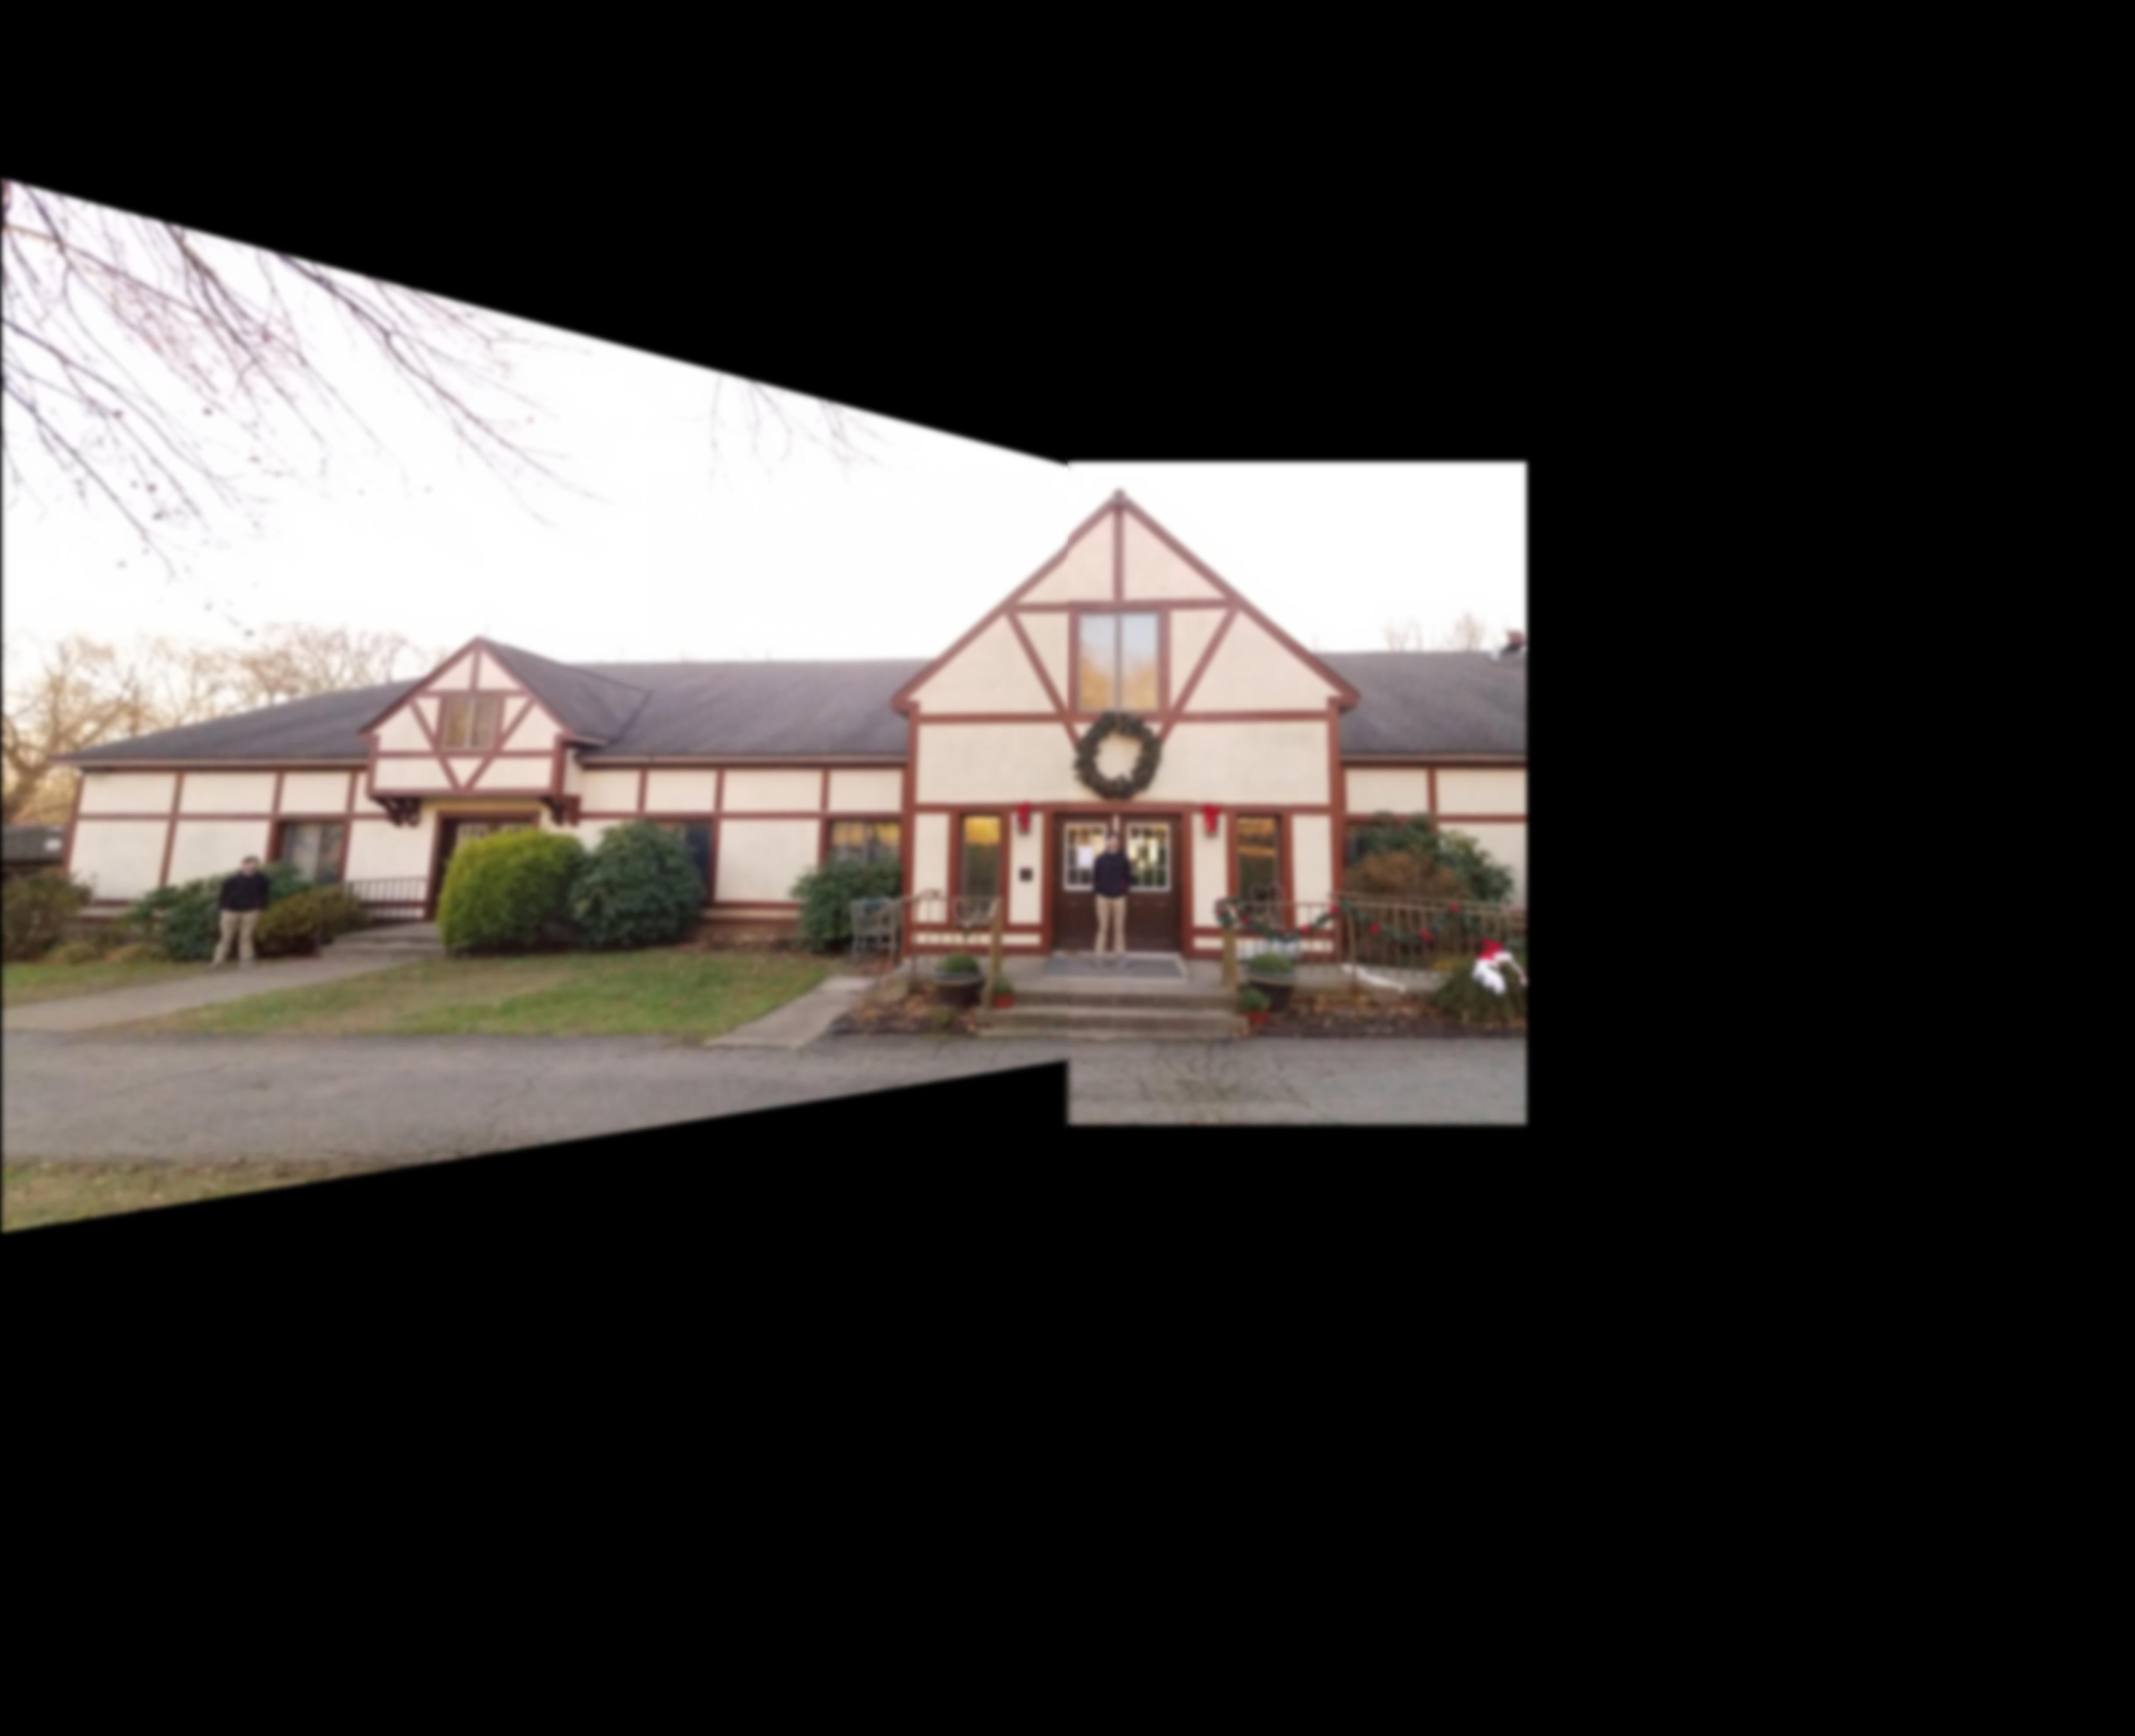
Blend the Images into a Mosaic
Now, I can take images of different parts of a scene, warp them so they are all facing the camera, and blend them using a laplacian pyramid into a mosaic.
Cool Learnings
For this part of the project, I was really impressed by how realistic the rectified images look. They are virtually indiscernible from images of the same object taken at a different angle!
Part B: Feature Matching for Autostitching
The first part of generating an image mosaic, picking correspondences, takes a lot of time and is oftentimes very error prone. So here I implement the algorithm detailed in this paper to automatically generate correspondences
Harris Corners
The first step was to find Harris corners, or points where there is a high change in both the x and y direction. To implement Harris Corners, I used the sample code here. Here are the outputs of Harris corners computed.
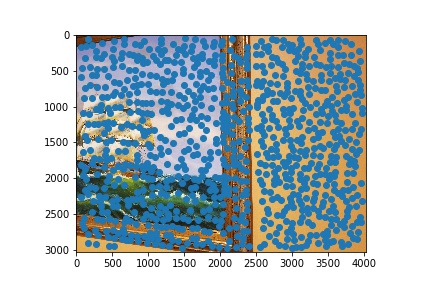
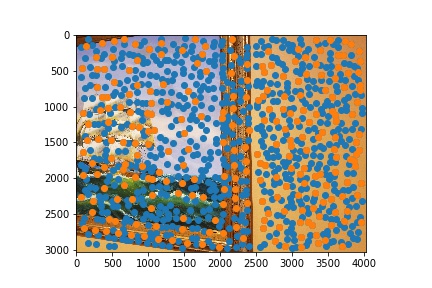
Adaptive Non-Maximal Suppression
The next step was to lower the amount of points using Adaptive Non-Maximal Suppression (ANMS) as described in the research paper. The points selected by ANMS are in orange, while the Harris corners are in blue.
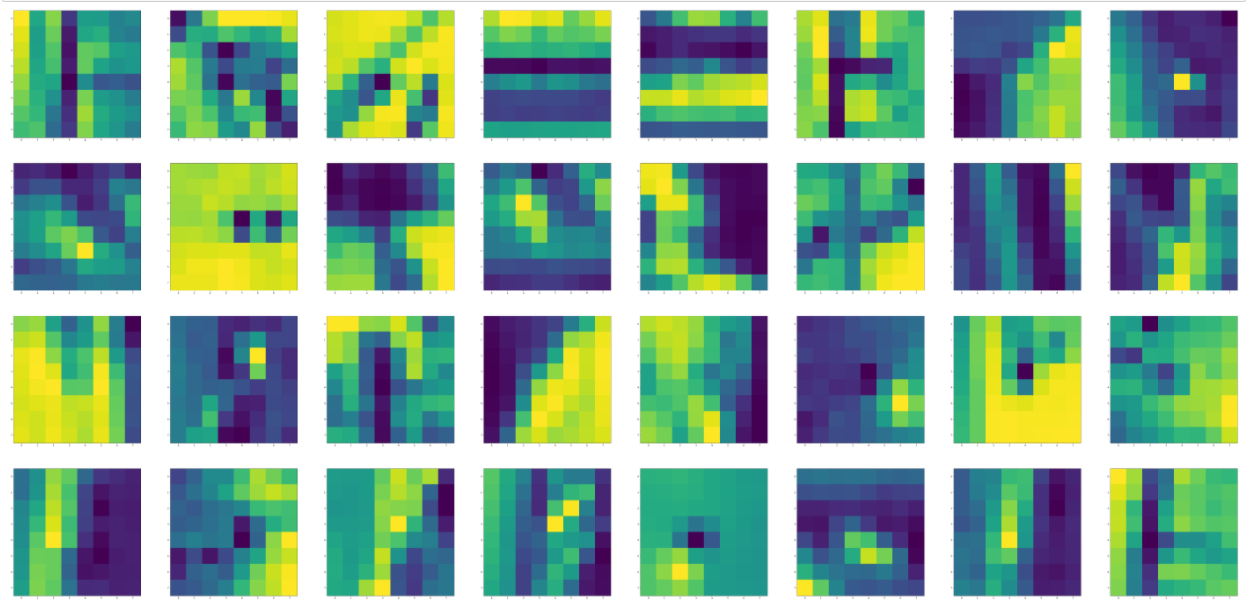
Feature Descriptors
Now I could extract feature descriptors from the image by first going up a level on the gaussian pyramid by filtering and resizing the image, and then taking an 8x8 region around each point as the descriptor. Some sample descriptors are shown below.
Feature Matching and RANSAC
To match the features of one image to another, I went through each of the descriptors in one image, and found its first nearest neighbor and its second nearest neighbor according to SSD. Then, I only kept the features whose ratio of first nearest neighbor to second nearest neighbor was below a certain threshold. I found the best results to be when this threshold was set to 0.6.
Finally, to compute a homography for the points given, I implemented a Random Sample Consensus (RANSAC) algorithm, described in the image below.
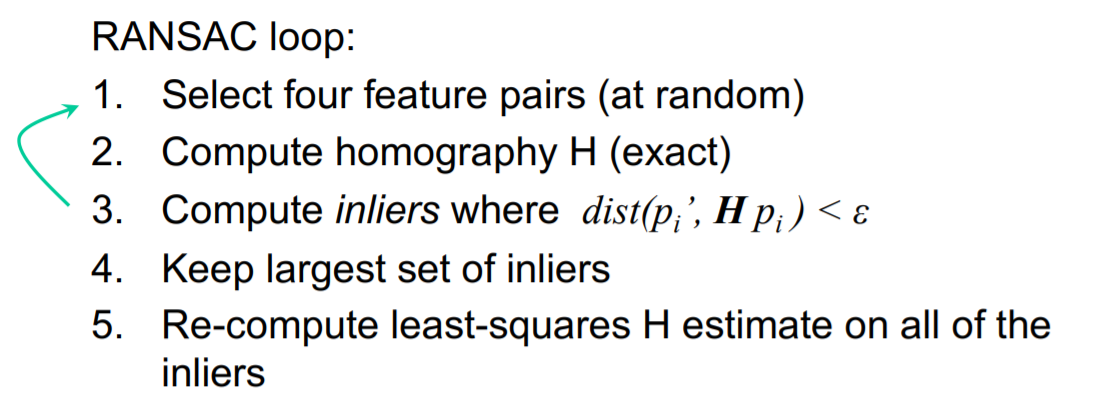
This gave me a homography that I could plug into the warping steps from part one to automate image mosaics!
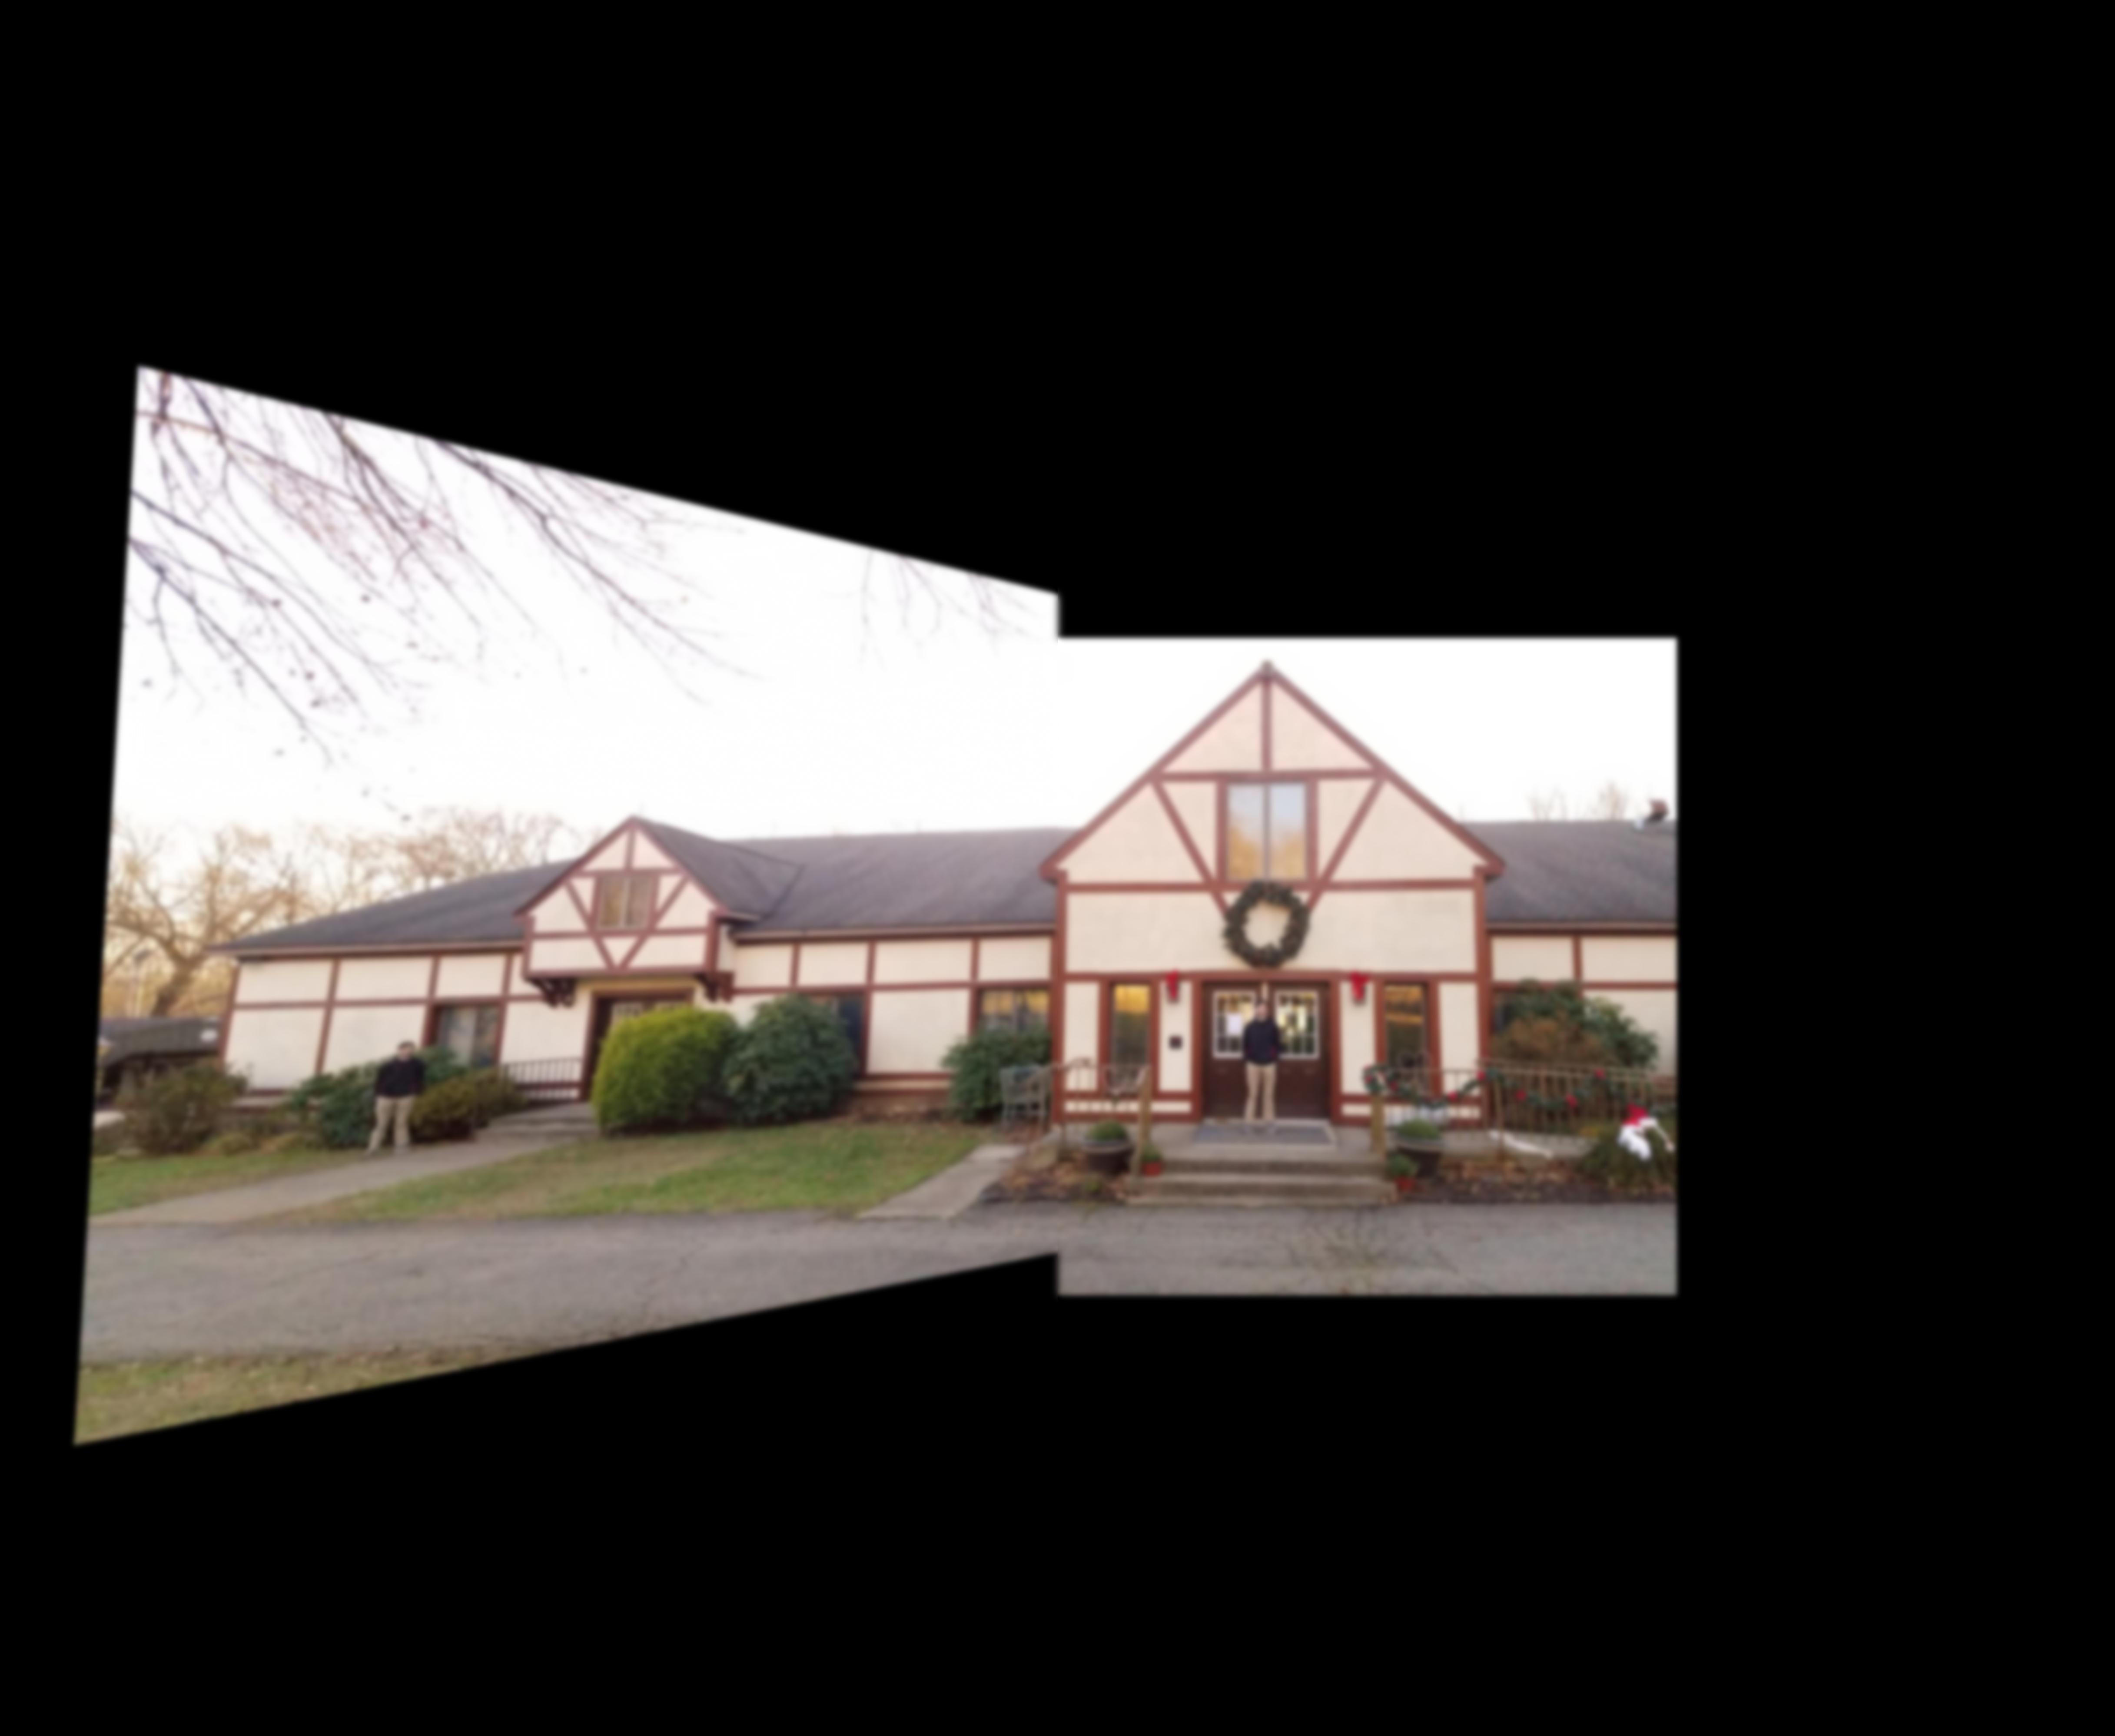
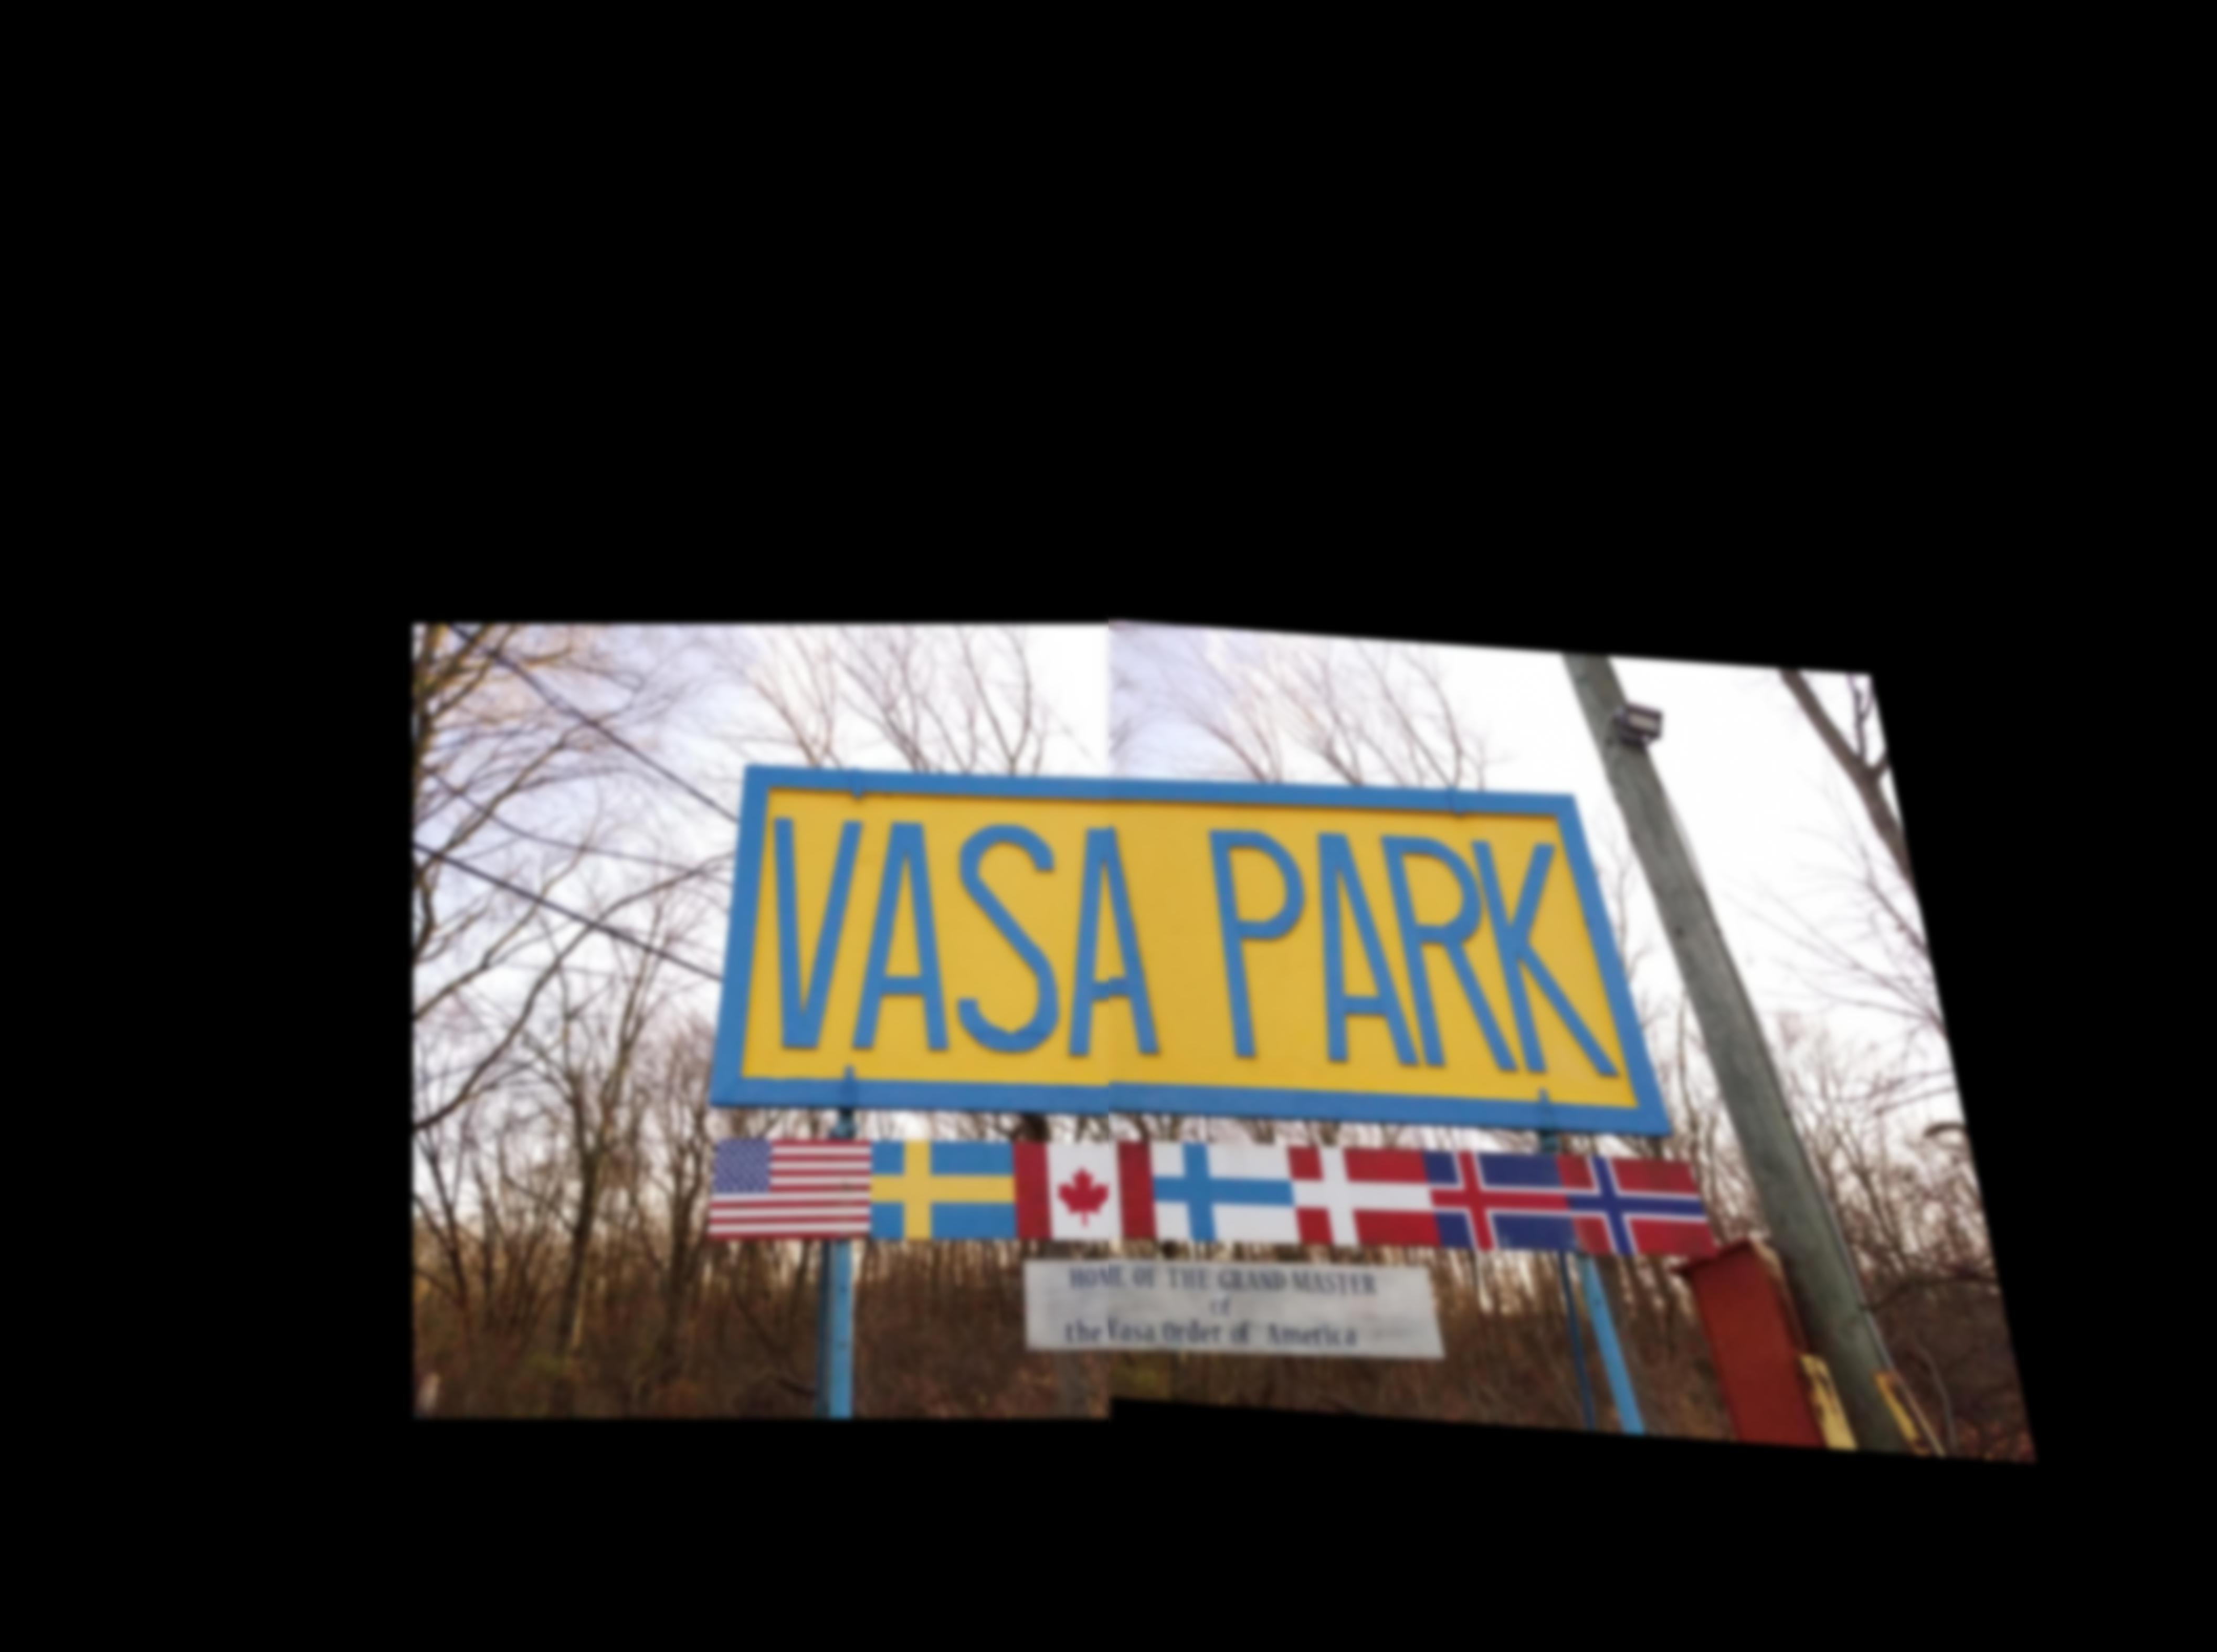
Final Image Mosaics

Learnings
The most interesting thing I learned from this project was the way the threshold was set for feature matching (first nearest neighbor over second nearest neighbor.) It was interesting how the fact that the features match up one to one allows us to effectively use the ratio to come up with a better threshold than just the SSD alone.